10 Small Yet Impactful DIY Decorating Changes for Smaller Budgets

We’re clearly all about DIY and home interior upgrades here. When we work with clients directly or advise our DIY students and customers, budgets vary highly. Some people are working on higher-tier renovations, and some live in rentals that they are just trying to make feel more like home. For those living in rental spaces, completing home improvements might be limited to changing up furniture paint colors and adding exciting new throw pillows as accents, versus being able to re-paint cabinets or front doors for home-owners. But trust us, as we’re current renters ourselves, there are tons of upgrades that one can do that are accessible price-wise and mobility-wise.
Here are some ideas we’ve put together for anyone on a smaller budget or living in a non-permanent space, which are all are under $200 for the average price range involved:
1) Paint your furniture to elevate your space, to make various styles feel more cohesive, and to just plain-old change up your scheme. ($45-$198, not necessarily including the furniture itself— this depends on whether you’ve owned it already or not.)
Whether you’re on a budget, have a varied collection of hand-me-down and thrifted furniture, or just love hunting older furniture with good bones, you CAN make your pieces feel updated and/or more cohesive. It’s great that these days we can find decent furniture in lower-cost ranges, including free (heck yes curb-side finds!).

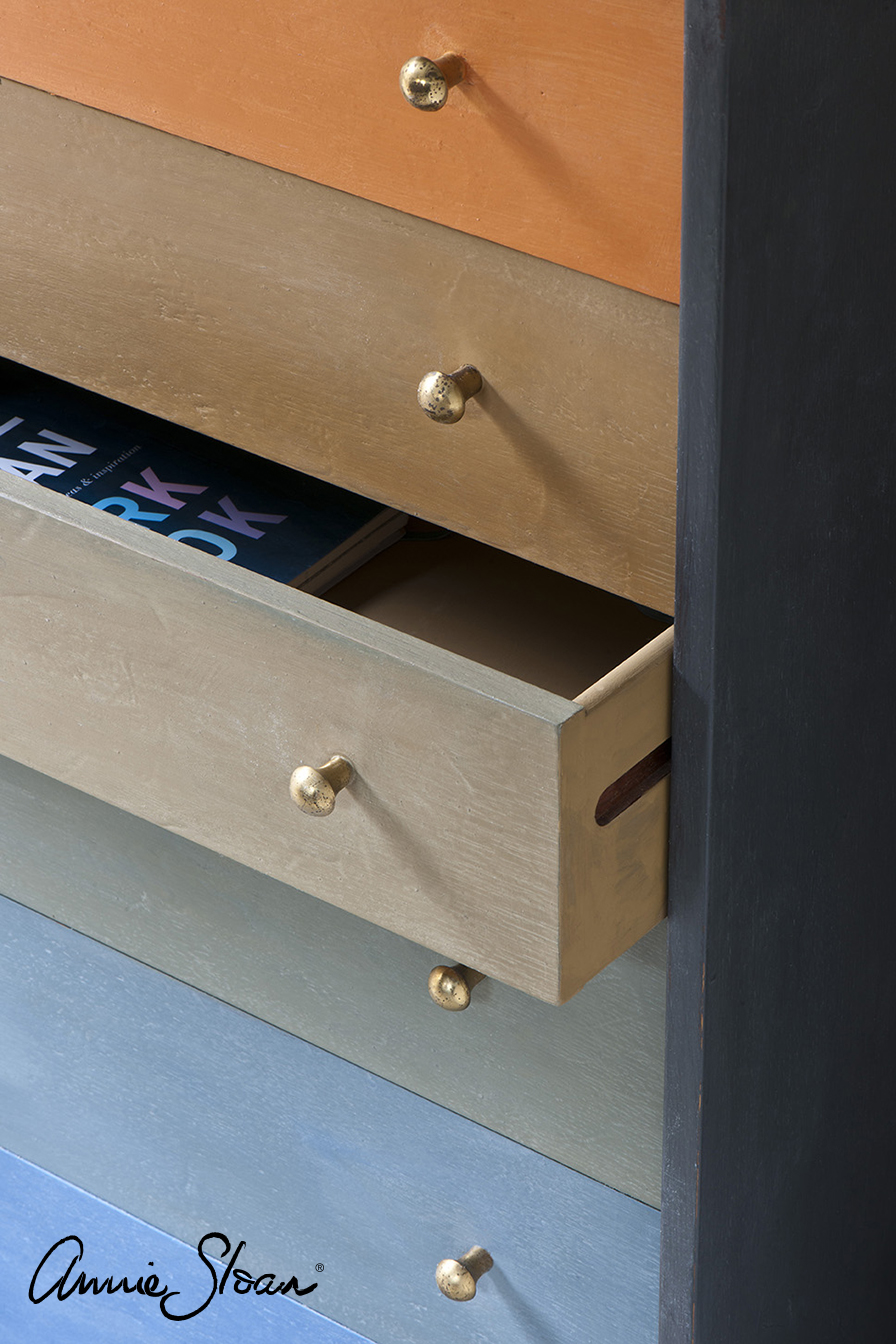
images from Annie Sloan (left and center), and Farrow & Ball® (right)
With Chalk Paint® by Annie Sloan, there is little to no prep involved to get your furniture ready for painting other than cleaning them well. The bonus is this paint can be worked with indoors due to non-toxic properties and no to ultra-low VOCs, so it’s especially great for those of us who don’t have a garage or outdoor space to work in. Plus you can paint over basically any material (wood, plastic, you name it) and re-create any technique and look that you see.
Follow our FAQ guide on working with Chalk Paint® (the one and only!).
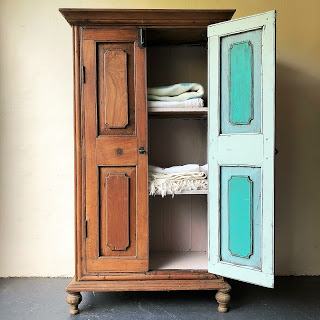

images from Shed Eleven (left) and Annie Sloan (right)
2) Create removable decoupaged drawer liners for kitchen, bathroom, or other cabinets for a secret pop ($25-$68)
Many rental situations come with less than ideal kitchen cupboard and drawer interiors, like old peeling liners and gunked up stains. Such is life. However, drawer liners are a classic fix to this situation! What’s fun is that you can create temporary drawer liners that have a bit more design pop to them these days. First find some cardboard (a great way to recycle, you can find free boxes off sites such as Craigslist) and cut pieces into the dimensions of your drawers. Then decoupage your favorite wrapping paper, napkins, wallpaper, or even fancier handmade papers such as from Paper Source to the cardboard. Then you can insert them into the bottom of the drawers once dried. If you move out, you could even reuse them in your new kitchen or bathroom if the dimensions are the same (or cut them down in size).
Don’t forget to smooth bubbles in the paper out as you go, and to finish the paper with your decoupage medium or even a more water-repellent medium in case the liners need to be gently cleaned.

image from Blue Eyed Yonder
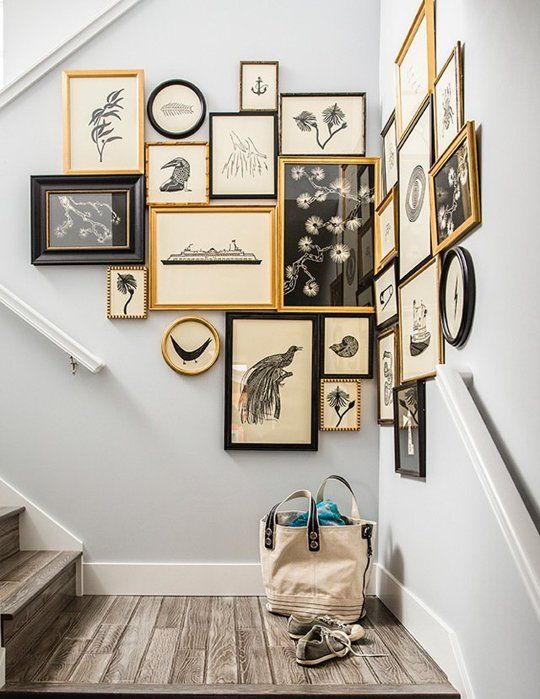
3) Add metallic gilding wax to the trims of collected frames for a gallery wall. ($11- $40)
Gallery walls have been in style for a while, and for good reason— they do serve multiple functional purposes. Large-scale artworks can be pricey, and so a gallery wall creates a large-scale scheme made up of multiple smaller parts; and a gallery wall is the perfect way to display your collection of cards, photos, prints, and more, to fit any style. A budget-friendly way to do this is by collecting frames from thrift stores and yard sales first, and then alter the frames (if desired) to be more cohesive together— because, let’s face it, if you’re collecting multiple frames from all over the place, their designs probably won’t match (although that could be a style unto itself, but that’s another story). Making them all the same color or appear to be the same material can be done in a glam way with GILDING WAXES.
Gilding waxes are magical. Choose from a few different shades, and simply apply the wax over your frame material. Hang the frames once dried. Check out this great guide from Apartment Therapy on how to decorate your gallery wall. You can rearrange your frames anytime, including if you move.
images from ehomedecorations.com (left) and Thomas J. Story via Apartment Therapy (right)
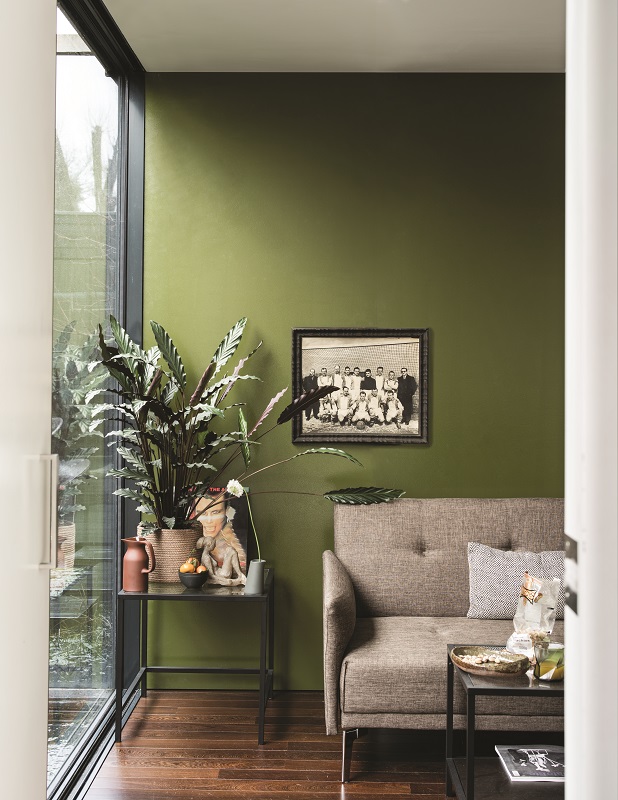
4) If you rent and have a landlord that is very encouraged by you making tenant improvements or will do rental reimbursement after ‘improvements,’ inquire about painting a bathroom vanity, or even an accent wall. ($70-$150)
Not all landlords do this, but if you’ve lucked out, use tenant improvements to your advantage. Take on smaller-scale improvements first, such as painting a bathroom vanity or painting an accent wall, and see where that takes you. Some landlords or agencies might have you re-paint a wall back to their choice color upon moving out, but if it’s still a worthwhile project for you and your space, this can work wonders! And if you own your home, this is a more budget friendly way to start repainting your interior.
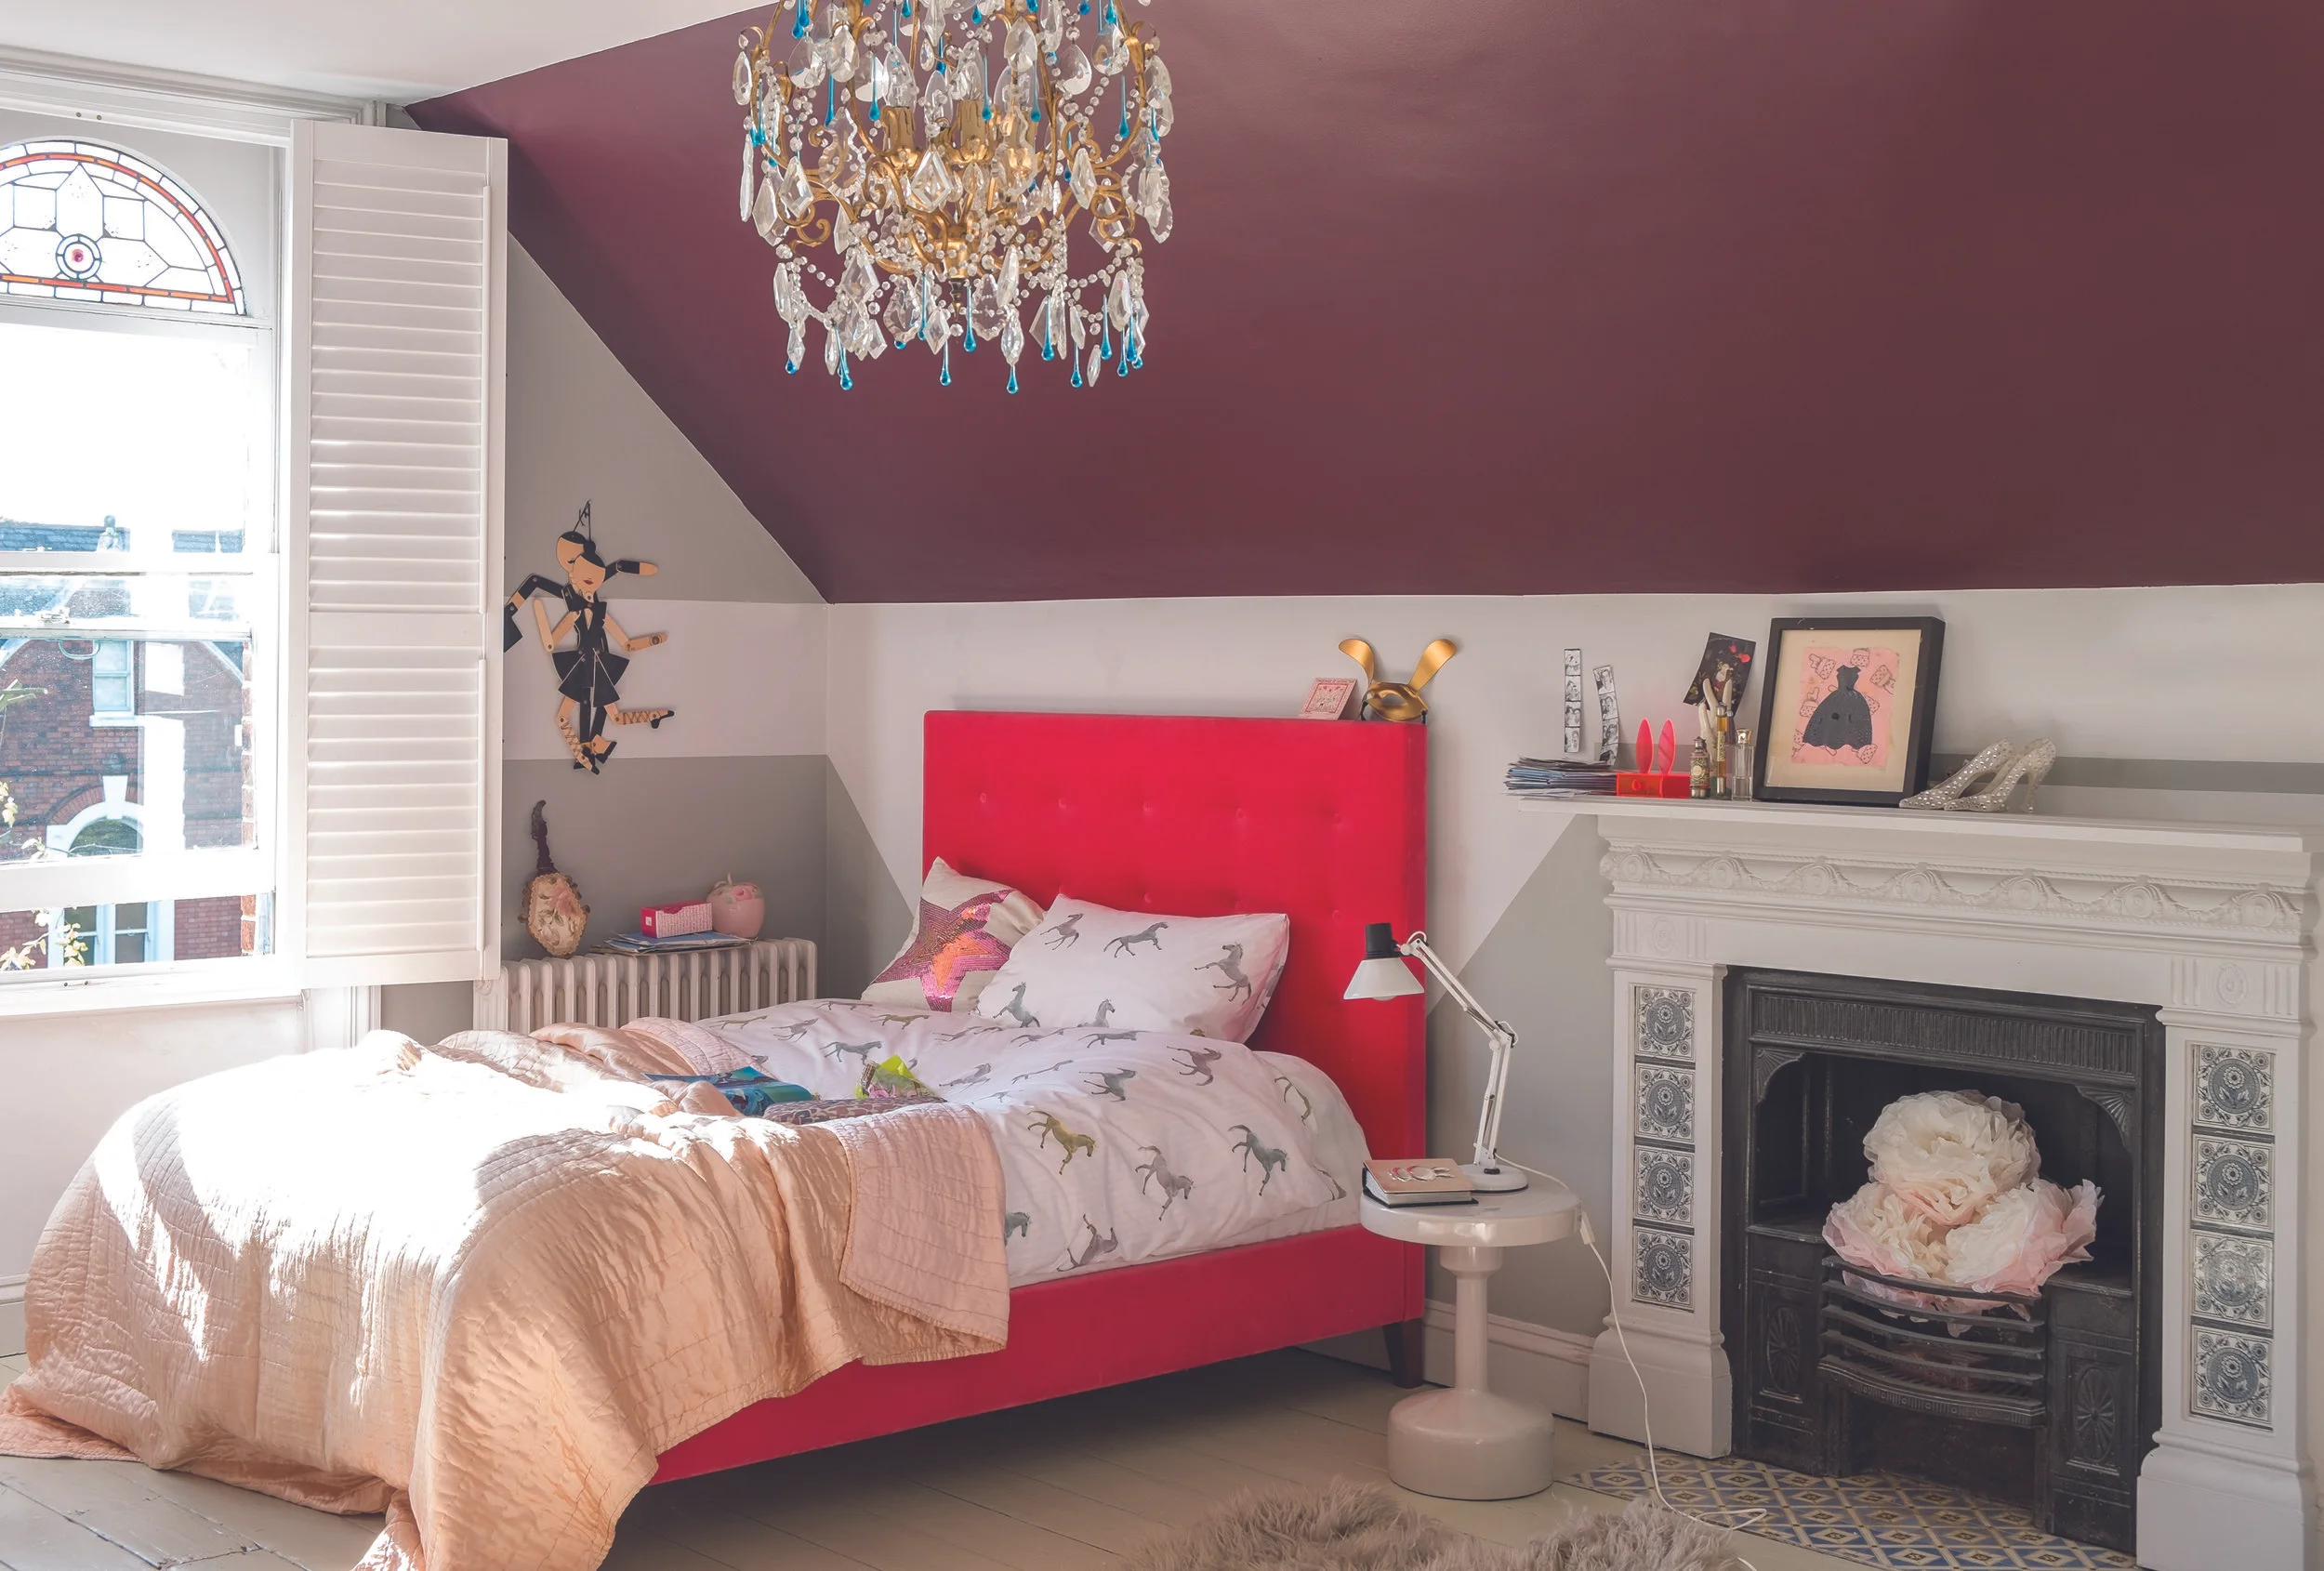
Check out these lovely inspiration photos with projects done in Farrow & Ball® Paints. A gallon of F&B paint typically covers way more than other premium paints out there, has more color depth, and literally cannot be matched at other paint stores. They are also no to ultra-low VOC and non-toxic in formula, so F&B paints are ideal for any home, especially for smaller spaces and rentals. For walls, check out the dead-flat Estate Emulsion for low-traffic walls, and matte Modern Emulsion for high-traffic walls like in kitchens, entryways, and bathrooms.
images from Farrow & Ball®
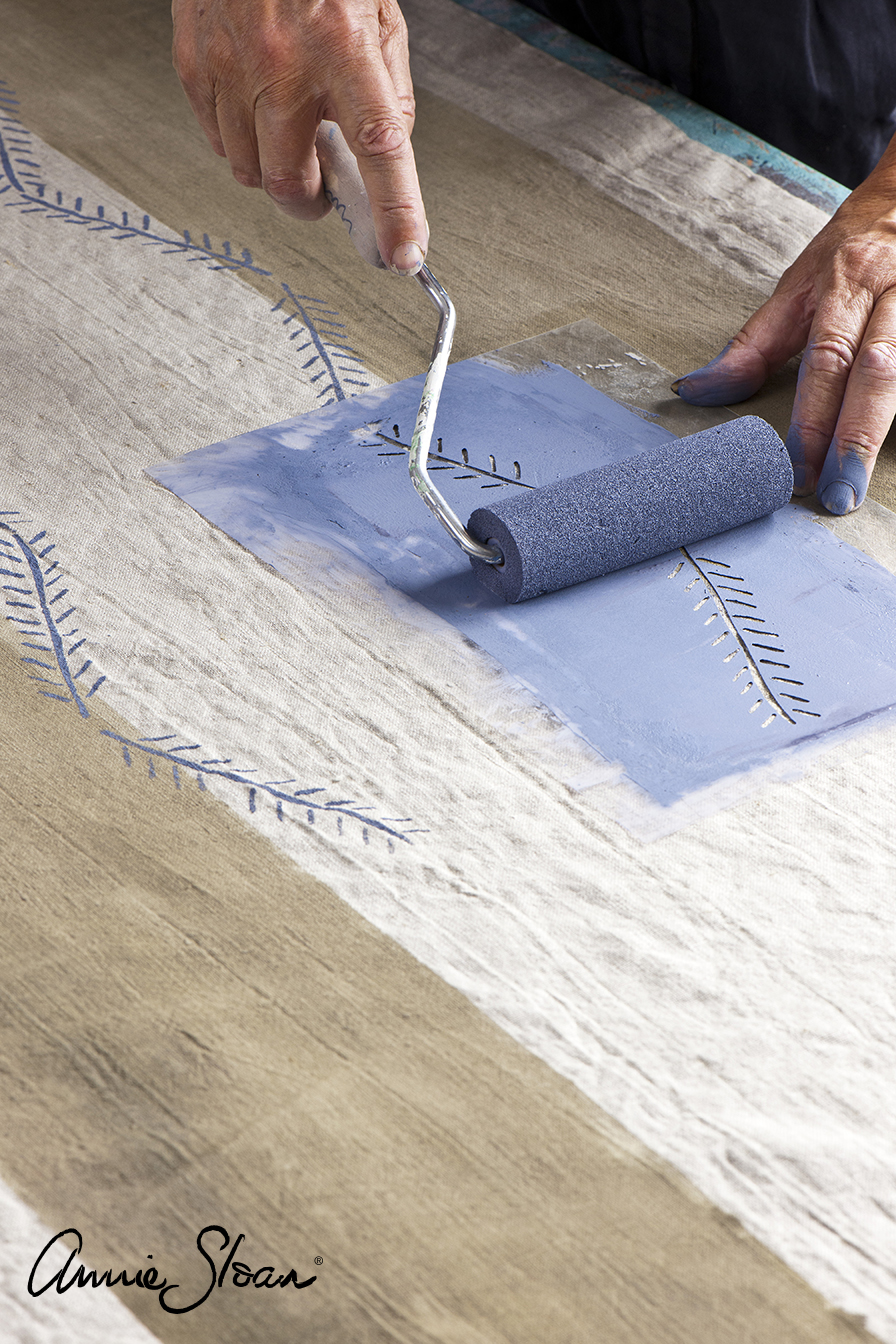
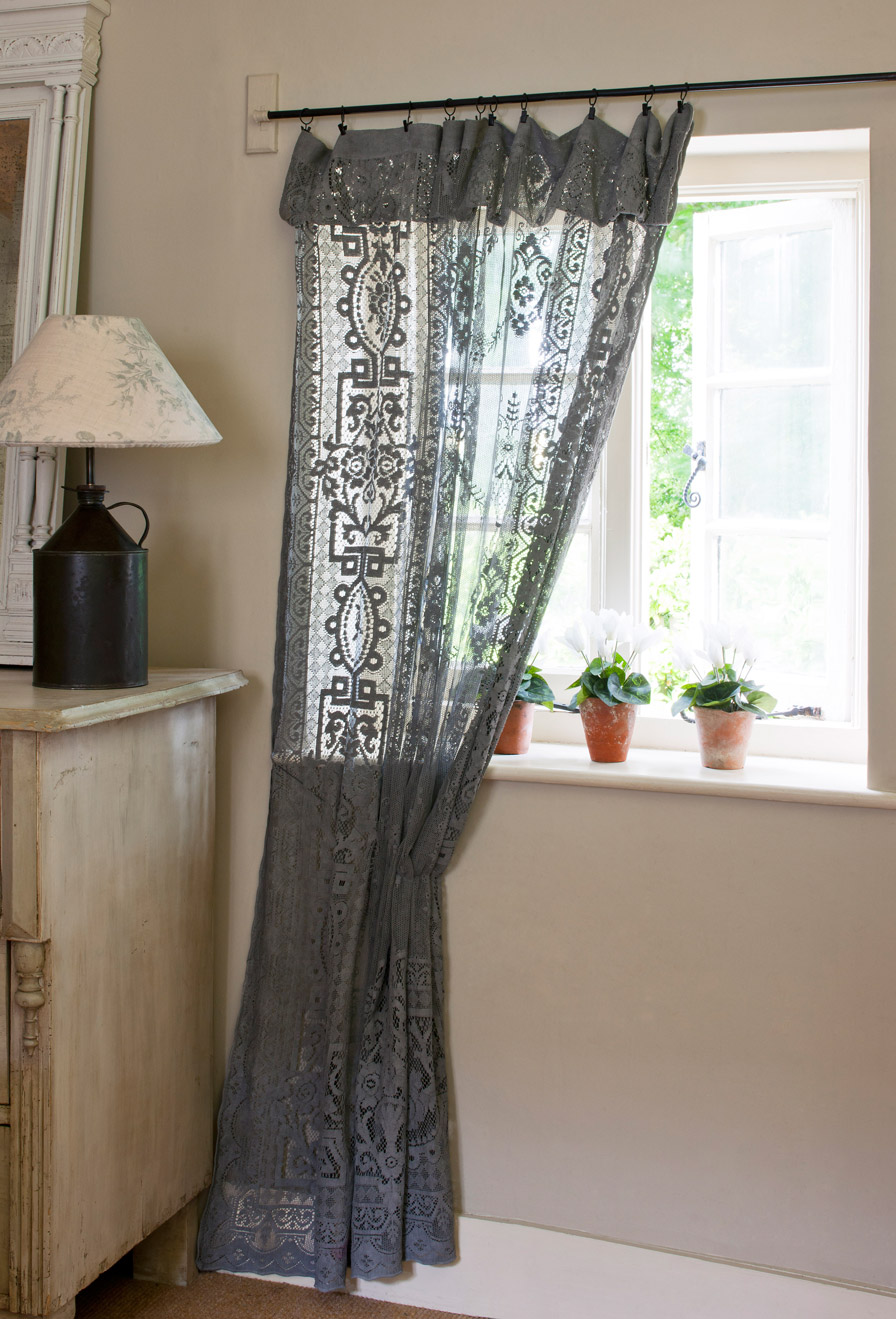
5) Update and/or add fabric items, including painting upholstery and dying or stenciling fabric with Chalk Paint® by Annie Sloan. ($15-$150, not necessarily including the cost of the furniture or decor items themselves— this depends on whether you’ve owned them already or not.)
Add curtains for privacy and decorative effect! Add a cool stenciled pattern to revive that old jute rug of yours! Dye or stencil inexpensive pillow covers! Working with Chalk Paint® has benefits that we’ve addressed many times in this blog, but who knew you could also paint and dye fabric with it? You absolutely can. Read this simple-step blog from Annie Sloan herself on dying lace curtains to look chic as ever (you know, ones that you can find at every single flea market, yard sale, and thrift store).
images from Annie Sloan
You can even recreate painted upholstery on worn out chairs with fabrics from linen to leather (just know that this isn’t necessarily a project suited for every single upholstered piece, but chat with your local Annie Sloan stockist like us for the best advice). Hometalk has a great before and after blog post on painted upholstery with Annie Sloan.

image from Hometalk
6) If you have a patio, balcony, or yard space, paint all the various styles of collected plant pots into a cohesive color collection with Chalk Paint® . ($25-$50, not necessarily including the cost of pots themselves— this depends on whether you’ve owned them already or not.)
We’ve collected so many pots over the years with various patterns, colors, and materials. Some were found for free at the curb, and some were acquired in other inexpensive ways (don’t get us wrong, you can certainly splurge on a new pot from the hardware store or your favorite ceramicist). However if you want to tie them all together, a great way to do so is paint them all in one color for a seamless look, or mix and match complimentary colors and patterns with paint.
Chalk Paint® , again the solution for almost everything, can be used outdoors. On porous pots, you don’t even need to seal them since heat and sun will bake the clay of the paint into the pores. We enjoyed this post by blogger Nicolette Tabram on her pot-painting journey, and you should read it too.

image from Nicolette Tabram
7) Change the hardware on one or a few of your furniture pieces or cabinets. ($15-$85)
This is perhaps one of the smallest yet most impactful changes one can make without changing the finish on furniture and cabinets themselves. If you rent, keep and store the old knobs and pulls and just change them back when you move out! We here at Silk & Sage especially love the unique knobs and pulls from Anthropologie, however there are plenty of fun and budget-friendly hardware sources out there.
BONUS IDEA: change out a light fixture if you feel daring enough (and ditto, reinstall the old fixture when and if you move out).

image from Anthropologie
8) Lovingly placed plants work wonders. ($0-$75)
Choose plants that work with the amount of sunlight you receive as well as your lifestyle. Seriously, doing so will not only change your space but will also elevate your mood. If you have a green thumb, you don’t have to buy new— just watch for plant sales and browse Craigslist including their ‘free’ section, because people often let go of plants that they think are dead but have plenty of life leftover once revived with patience. Don’t forget to choose pet-friendly plant options too! Check out Apartment Therapy’s Indoor Plant Finder Guide and Guide to Indoor Plants for Small Apartments.

image from POPSUGAR.
9) Add more storage space wherever you can with good-looking DIY shelving. ($15-$65)
This is a perfect change or addition on a couple fronts: shelving adds character to your space as a design element while offering nooks for your other decor items (picture frames, crystals, books), and shelving adds more practical organization and storage for limited areas such as small kitchens.
First measure the space where you want the added shelving to gauge the best dimensions for the shelving itself. Then cut a wood board (or multiples as needed) to the correct size— most hardware stores or lumber warehouses will do this for you for no to low added cost. Then either paint, stain, or oil the shelves to fit your design scheme. Attach to the walls sturdily by resting the shelving on cool brackets (we love these from Anthropologie) or making hanging rope ties. Don’t forget your level, measuring tape, and screw anchors!
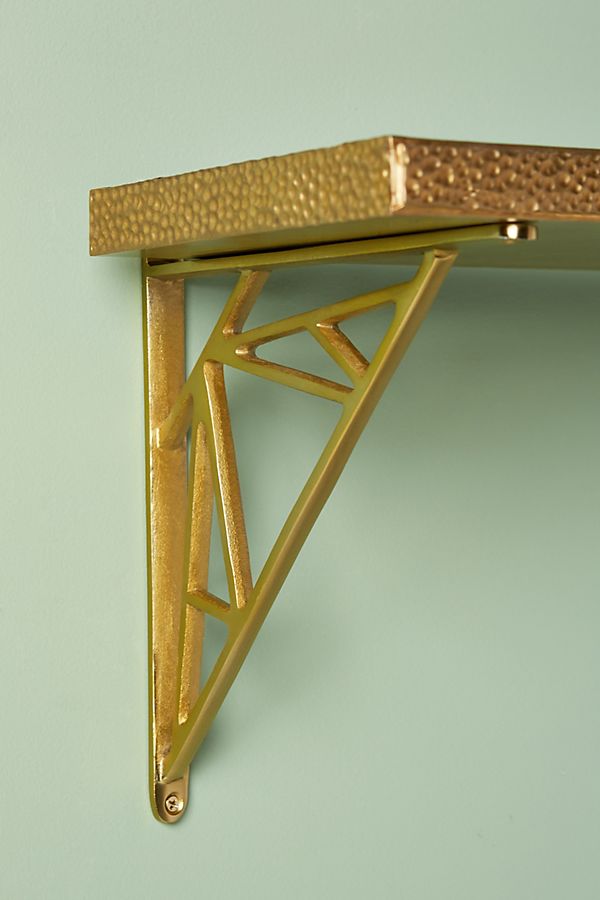

images from Anthropologie (left) and Annie Sloan (right)
10) Add a mirror to a smaller space to open it up— a tried and true solution! ($15-$195)
Home owners and renters have incorporated mirrors into their style scheme for almost any reason (do you really need an excuse?), and when used correctly, a mirror can open up smaller rooms and spaces. Just pick and choose your favorite style per your budget— and if you need to change up a thrifted or outdated mirror frame, just paint it or use metallic gilding waxes.
Isn’t this mirror from West Elm just dreamy?
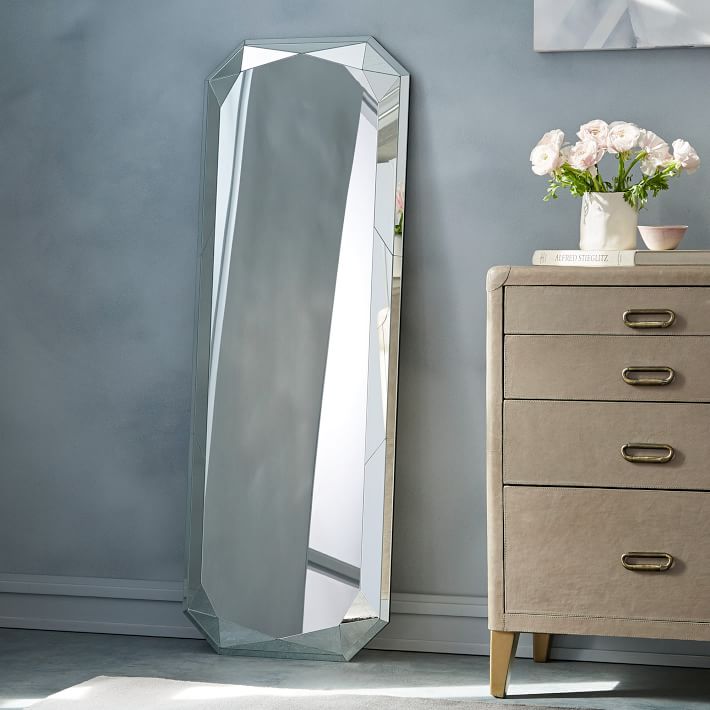
image from West Elm
These are just ten of many possible changes that can make your space feel more personal, no matter if you are renting or can’t expand yet on all the changes you want to make in your home right away. Some of these price ranges may vary due to the depth of your project, what kind of painting techniques you may do, etc. Also, please note that we are not affiliated with the links, retailers, and blogs provided other than with Annie Sloan and Farrow & Ball® . The other links, retailers, and blogs are just some that we have been inspired by and felt we should share with you too!