
Using Painted Details to Impact the Home (Trompe-L’oeil Meets Impressionism Edition)


If you’ve been following along with us, you know that here at Silk and Sage Design we’re big fans of transforming the feeling of spaces via three-dimensional forms— painted furniture, cabinets, and other decorative accents can utilize color and texture to alter emotions and perceptions within all areas of homes, work spaces, venues, and anywhere we inhabit for parts of the day. Details no matter how large or small truly add special touches to personalize our spaces. We recently had such a pleasure creating hand-painted details around a wallpaper mural in a client’s home, and we think it looks SO GOOD (we’re a bit biased of course!) to have enlivened accents added here. They gave our client a slightly more lived-in and personalized connection to the wallpaper and room itself. We’ll show you what we mean…

Our client had a mural wallpaper installed (panels from ‘Xanadu’ by Iksel x Schumacher, not installed by us) in her dining room. She had decorative trim added around the wallpaper panels to frame them out as their own scene, which we custom painted to emulate a branchy feeling. Different greens were custom painted with wet-blended and dry-brushed techniques, and we were careful to choose greens that would stand out a little but neither be too contrasted from the wallpaper nor blend in too much. Then the extra fun part came… hand-painted branches and leafy sprigs ‘escaping’ from the sides of the wallpaper. The painted framing was key here, as it created a canvas for the wallpaper mural that the new painted details could escape and trail outward from.


We’re always inspired by trompe-l’oeil as a centuries-loved painting style that fools the eye with realistic optical illusions via painted imagery. The wallpaper illustration itself was more ‘impressionist’-meets-watercolor-meets-fresco-style, so we blended all these concepts to come up with the best mimicry of our little hand-painted leaves and branches. Placement of these was key too as we wanted to have the painted details feel balanced but not contrived.


The result feels lively and playful, and exactly what we hoped— some elegantly personalized whimsy for this dining room. Whether we’re working on painted or refinished furniture, walls, or other decorative areas, we prioritize some level of customization so that we achieve connection with our spaces. Of course hand-painted details aren’t for everyone’s tastes, or even for just a specific project… other great ideas for personalizing decorative elements could be simply with color choice alone, or with textural techniques, or with stencils and/or appliques for decorative pops. The options are endless!
If you’re curious about how we can help you personalize your home with painted furniture, cabinets, or other motifs and are in the Austin-area, send us your project details! Visit our ‘Hire Us’ page to submit project inquiries and see some of the work that we do!

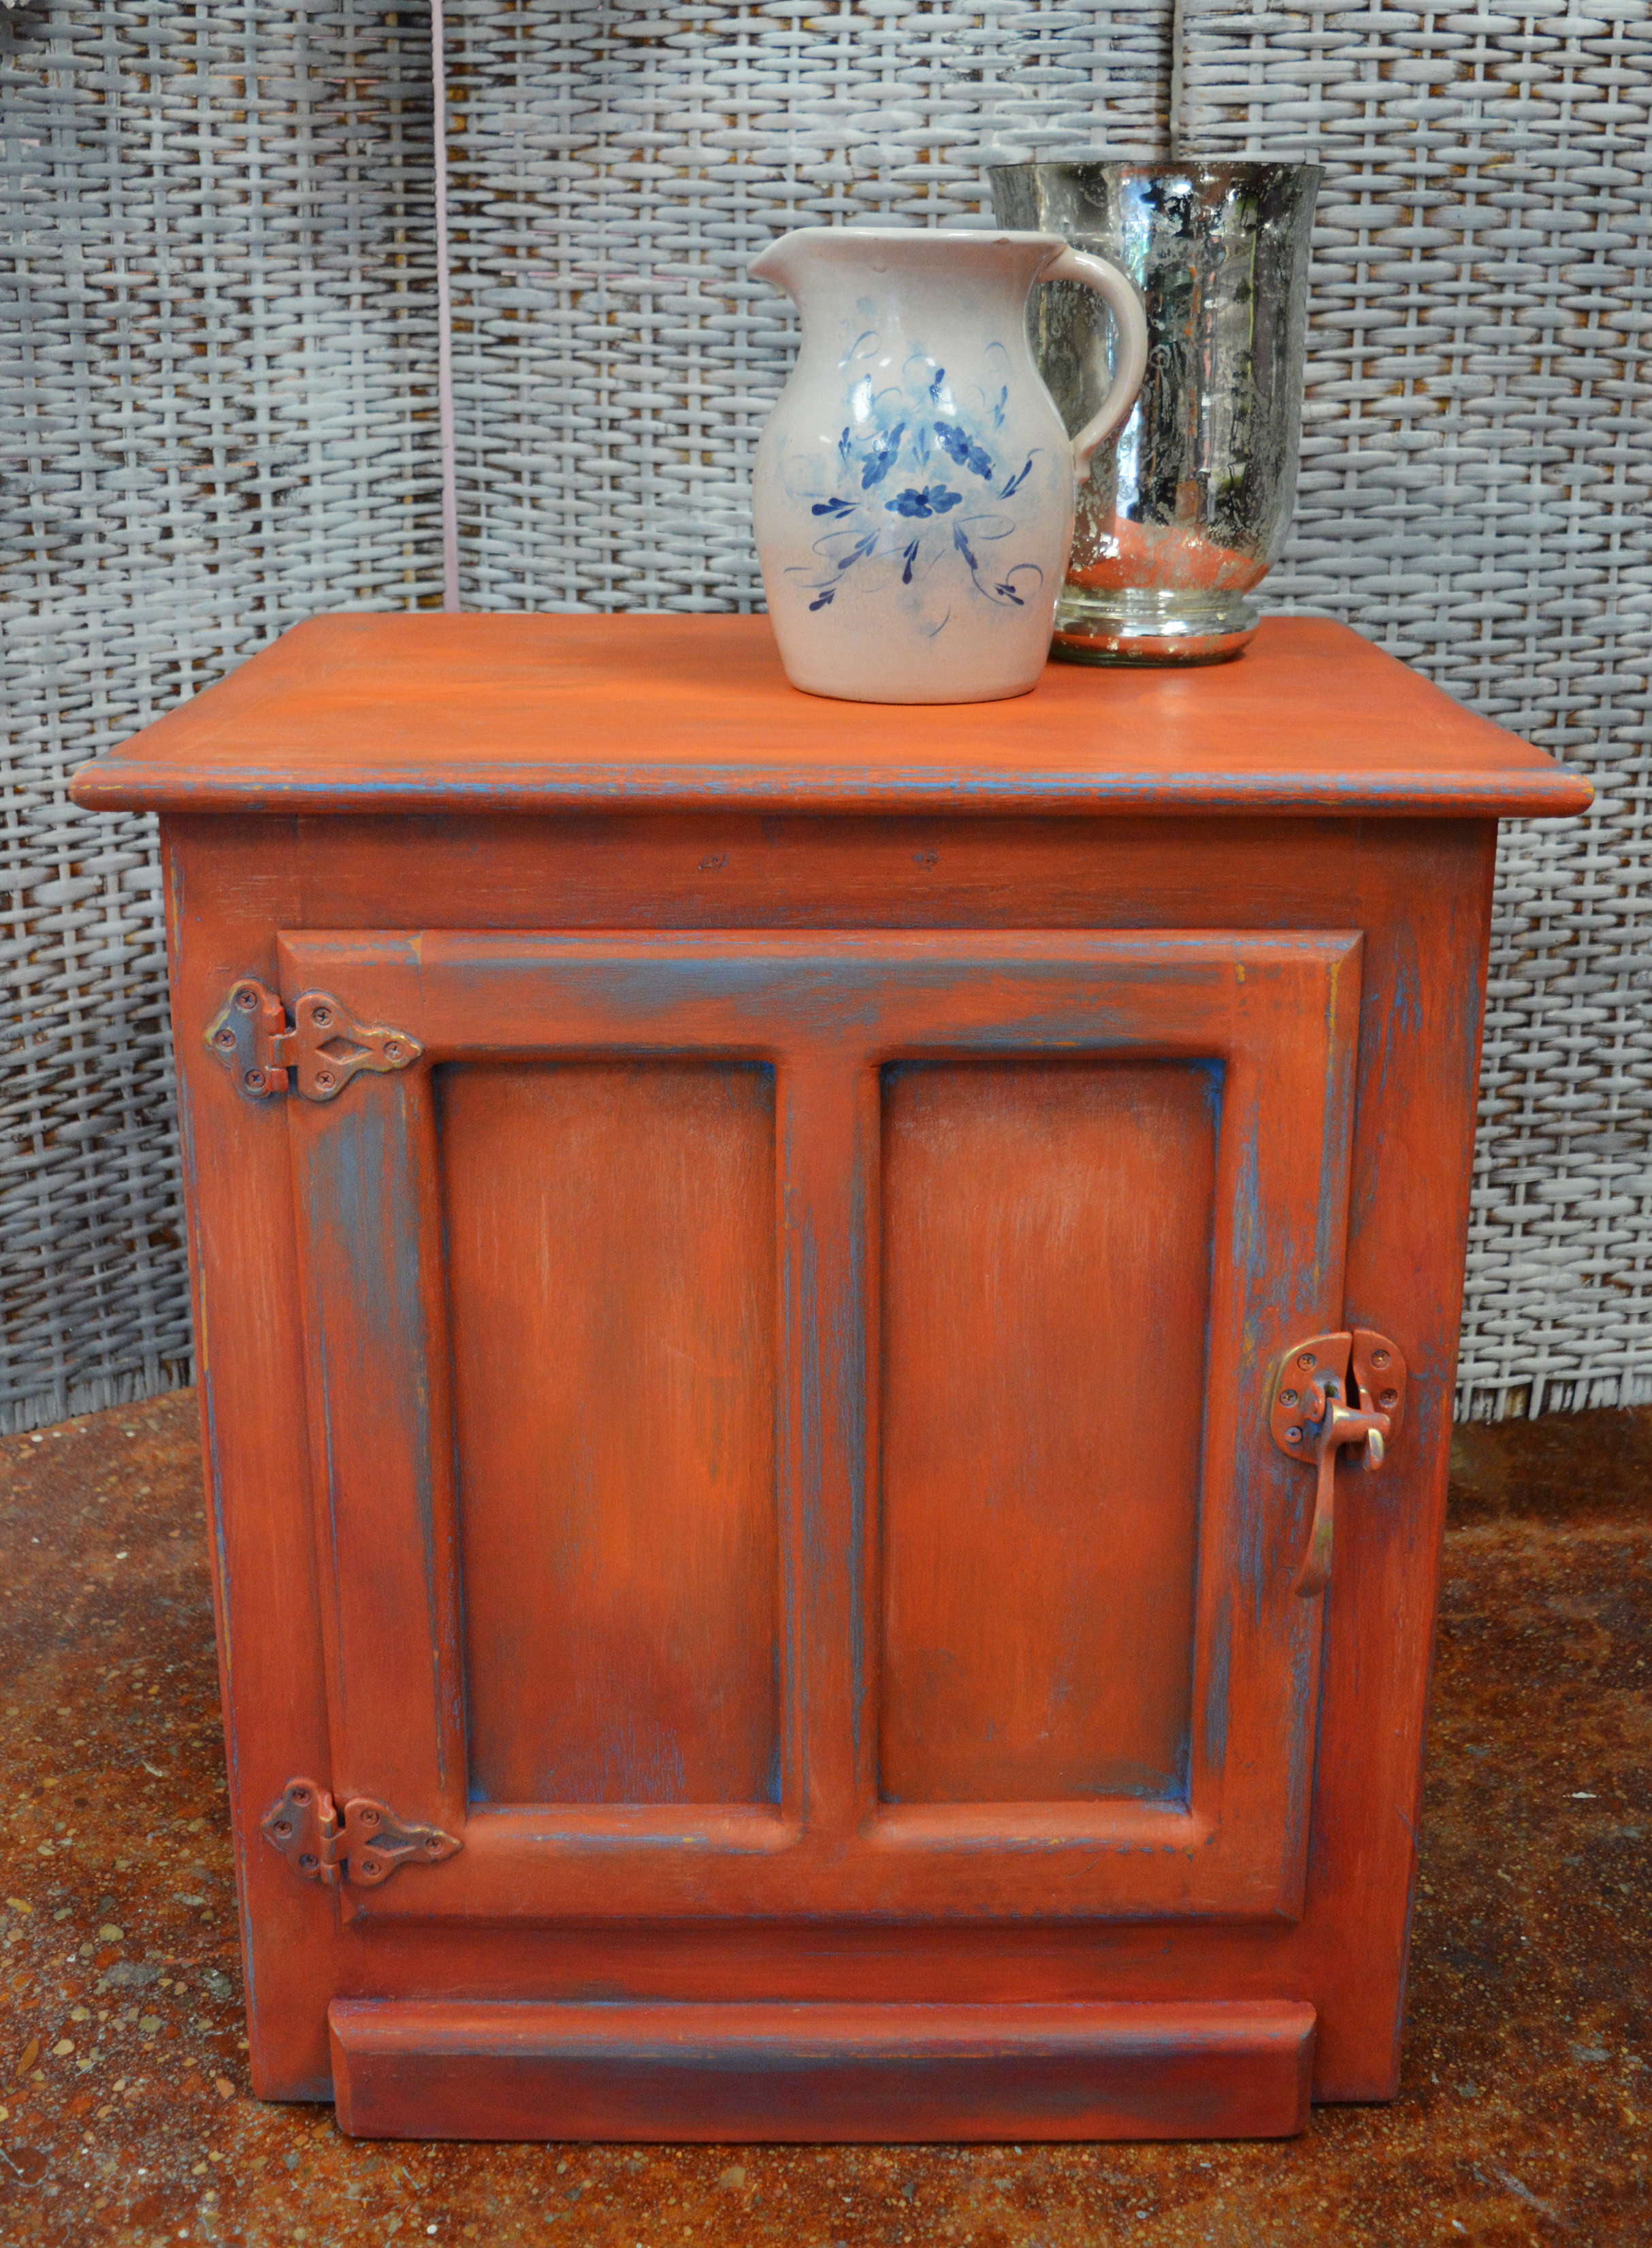
Before & After: 'Persimmon' + Greek Blue Cabinet
A pop of color is just what this little cabinet needed...


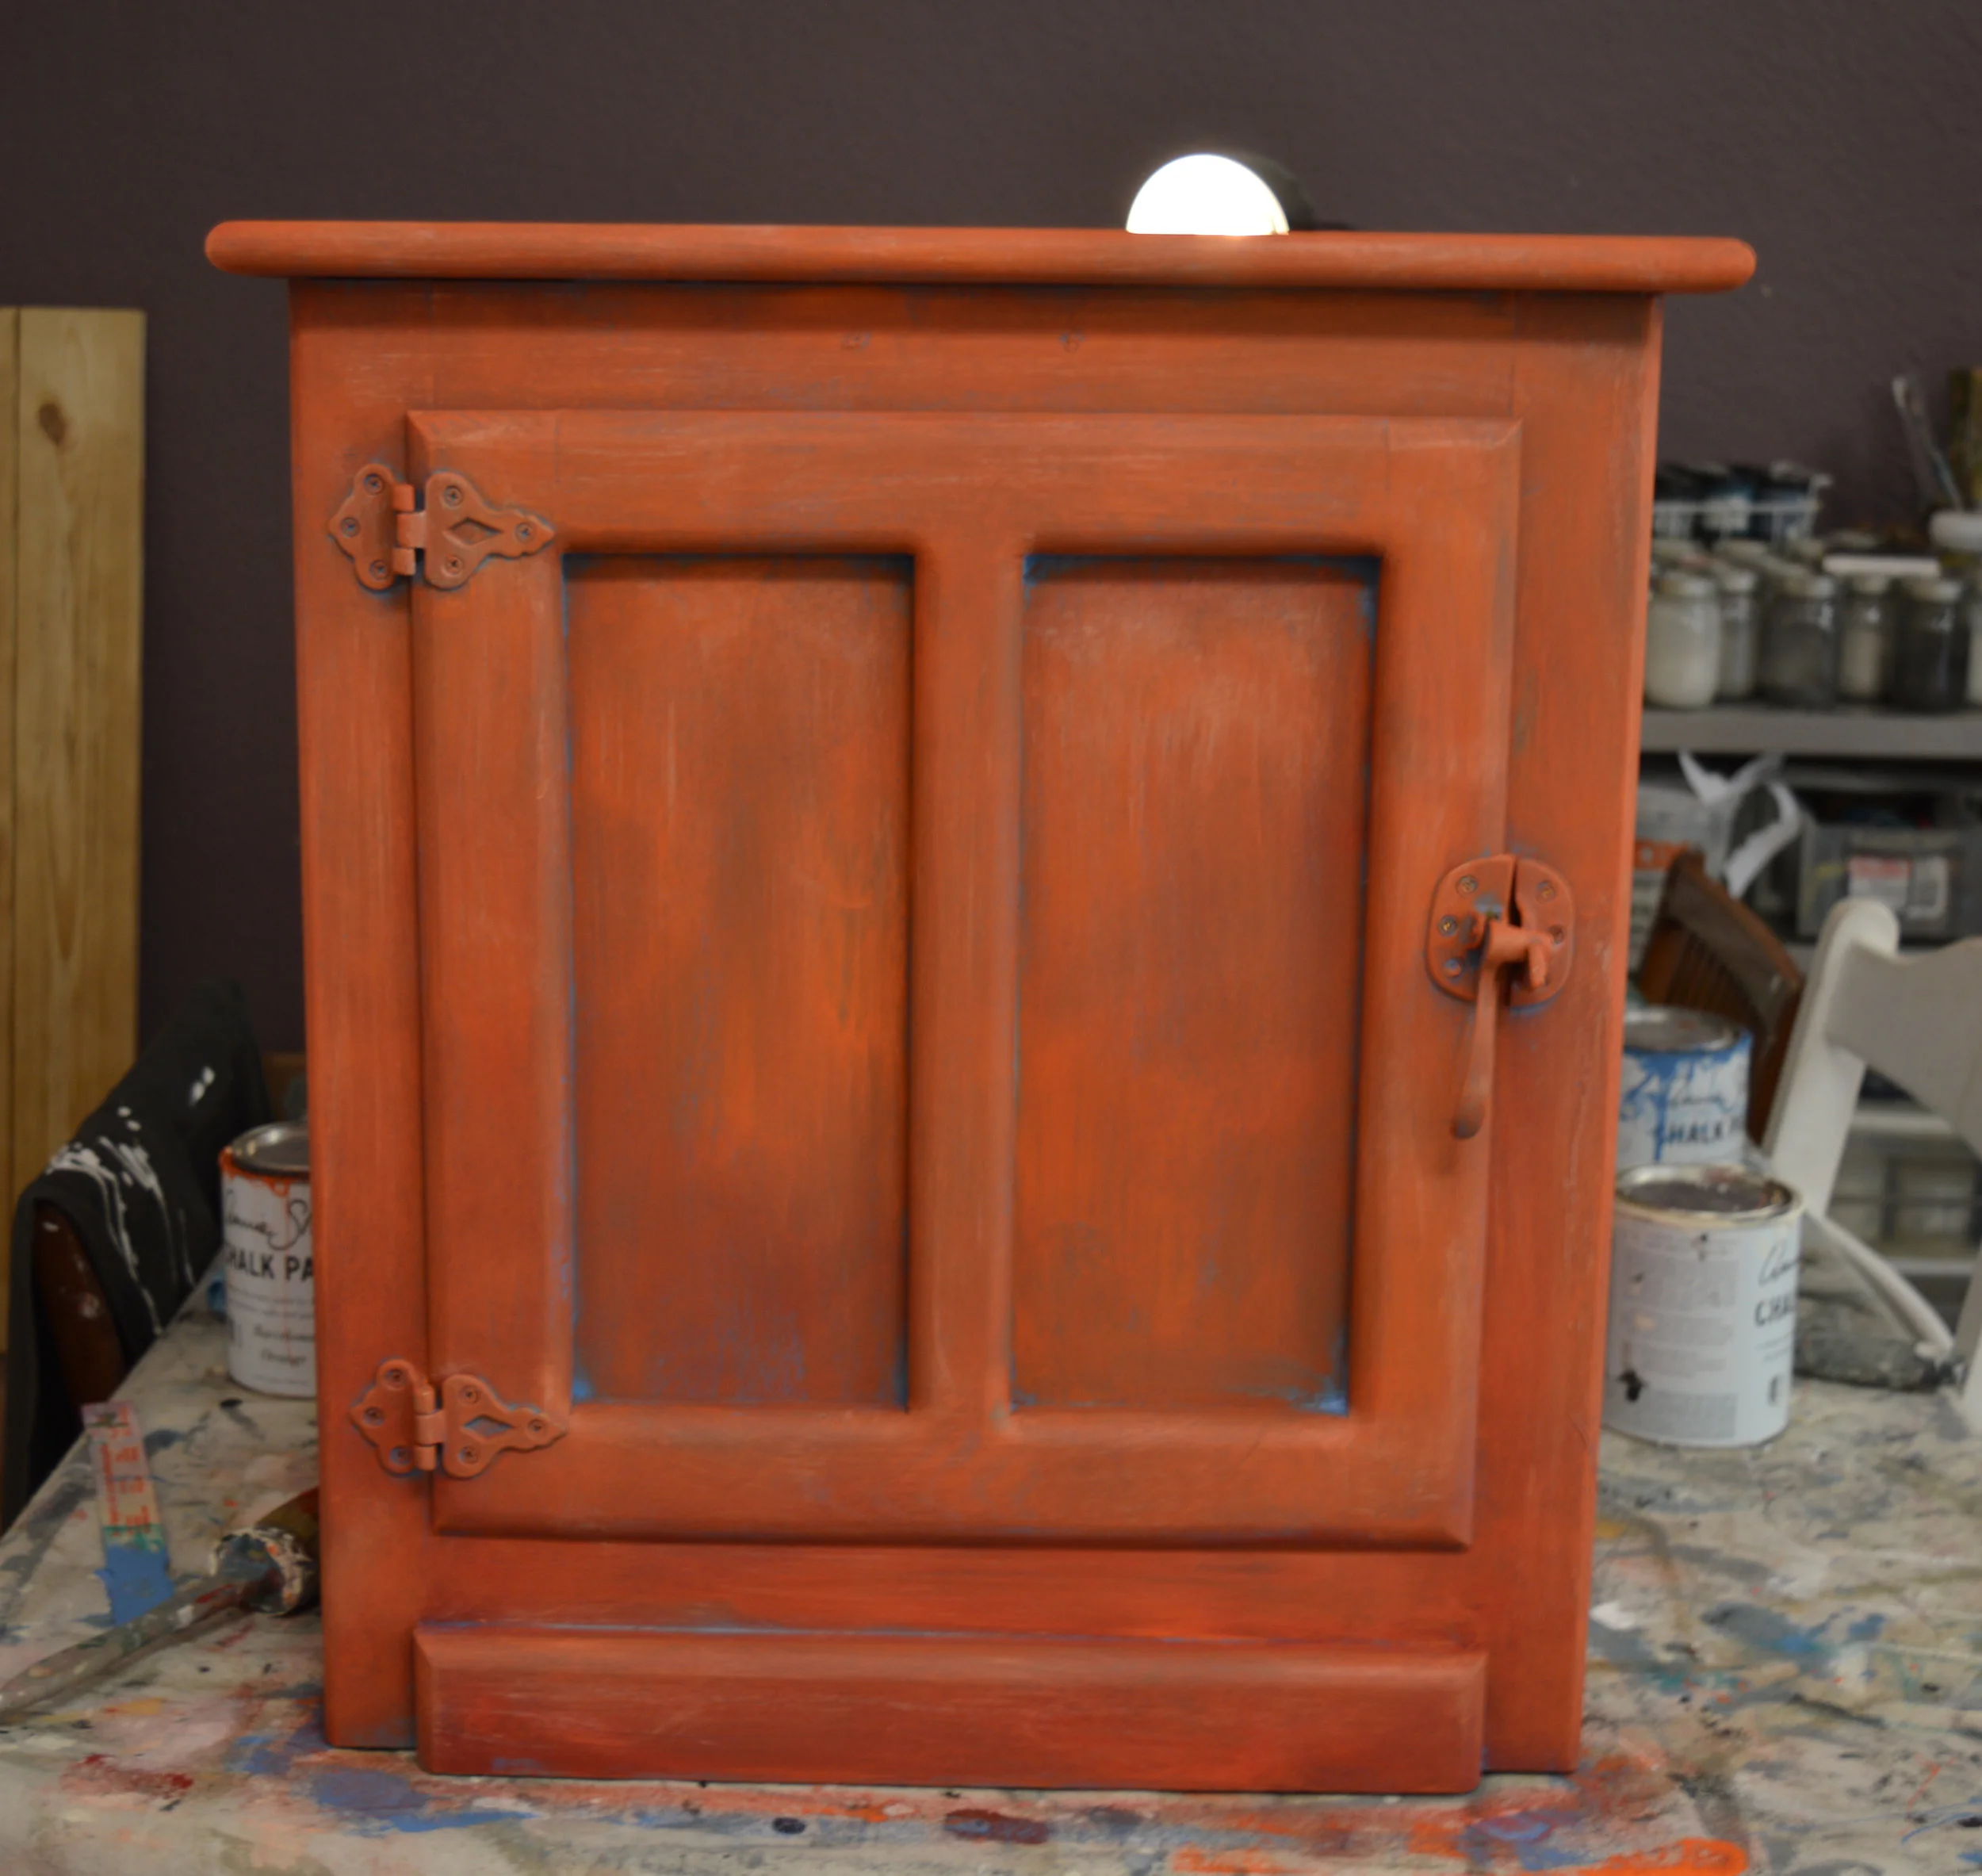
For us furniture and interior painters, we know that projects often go in 'inspiration stages,' during which choosing the color can be the hardest part! We had a little boxy cabinet that was hanging around the studio just waiting to be painted, that we knew should have a pop of color and texture. We were a little stuck... until we remembered a piece that we had been previously been inspired by, by Leslie Stocker. Using Chalk Paint® decorative paint in Greek Blue, Barcelona Orange and Emperor's Silk blended together, and Old White accents, we created a finish that we absolutely LOVE! The idea was to combine opposite colors from the color wheel for a distinct look (such a great design technique for you to explore on future projects).

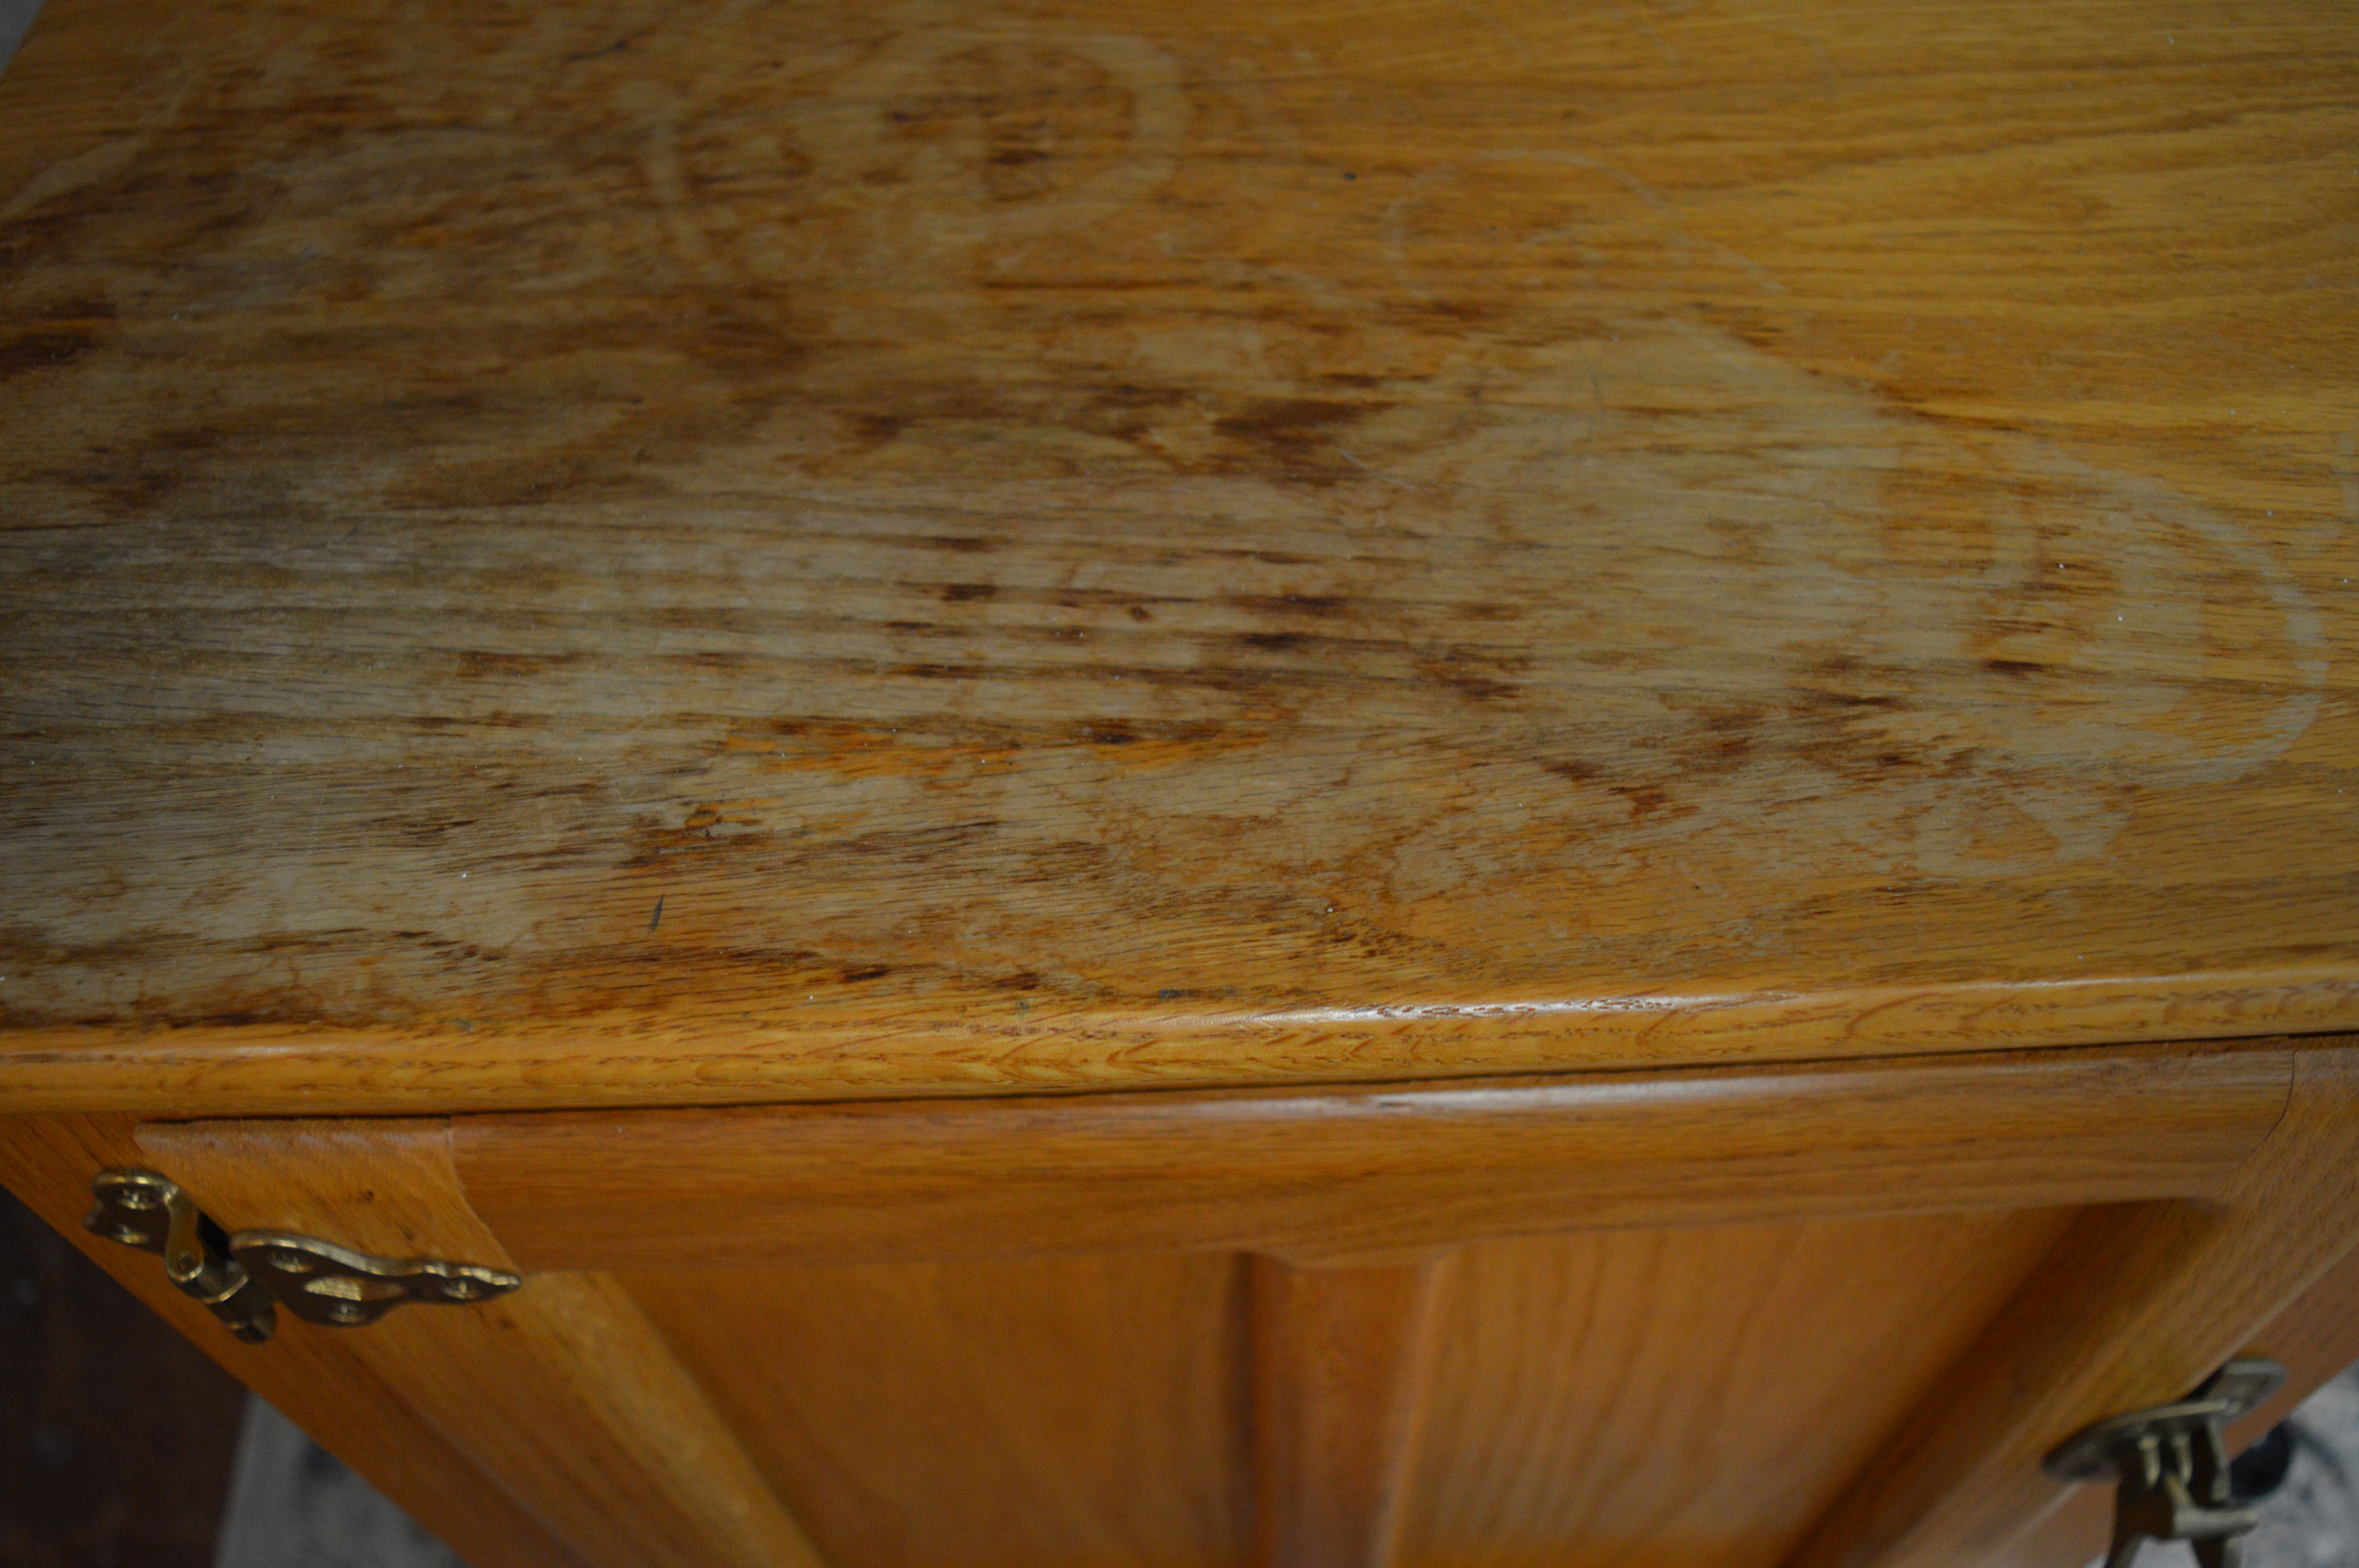
As usual, we cleaned the piece down first. Then we base-coated with Greek Blue, applying it thickly and essentially glopping it on for texture with our medium no. 12 Natural Round Brush. This brush helps create anything from barely-there texture to thick hills and valleys! We also waited for some paint to dry for 10-15 minutes and then brushed back and forth over it to pull up even more texture, and then let dry. We wanted the texture to hide some of the water damage to the varnish on the very top.


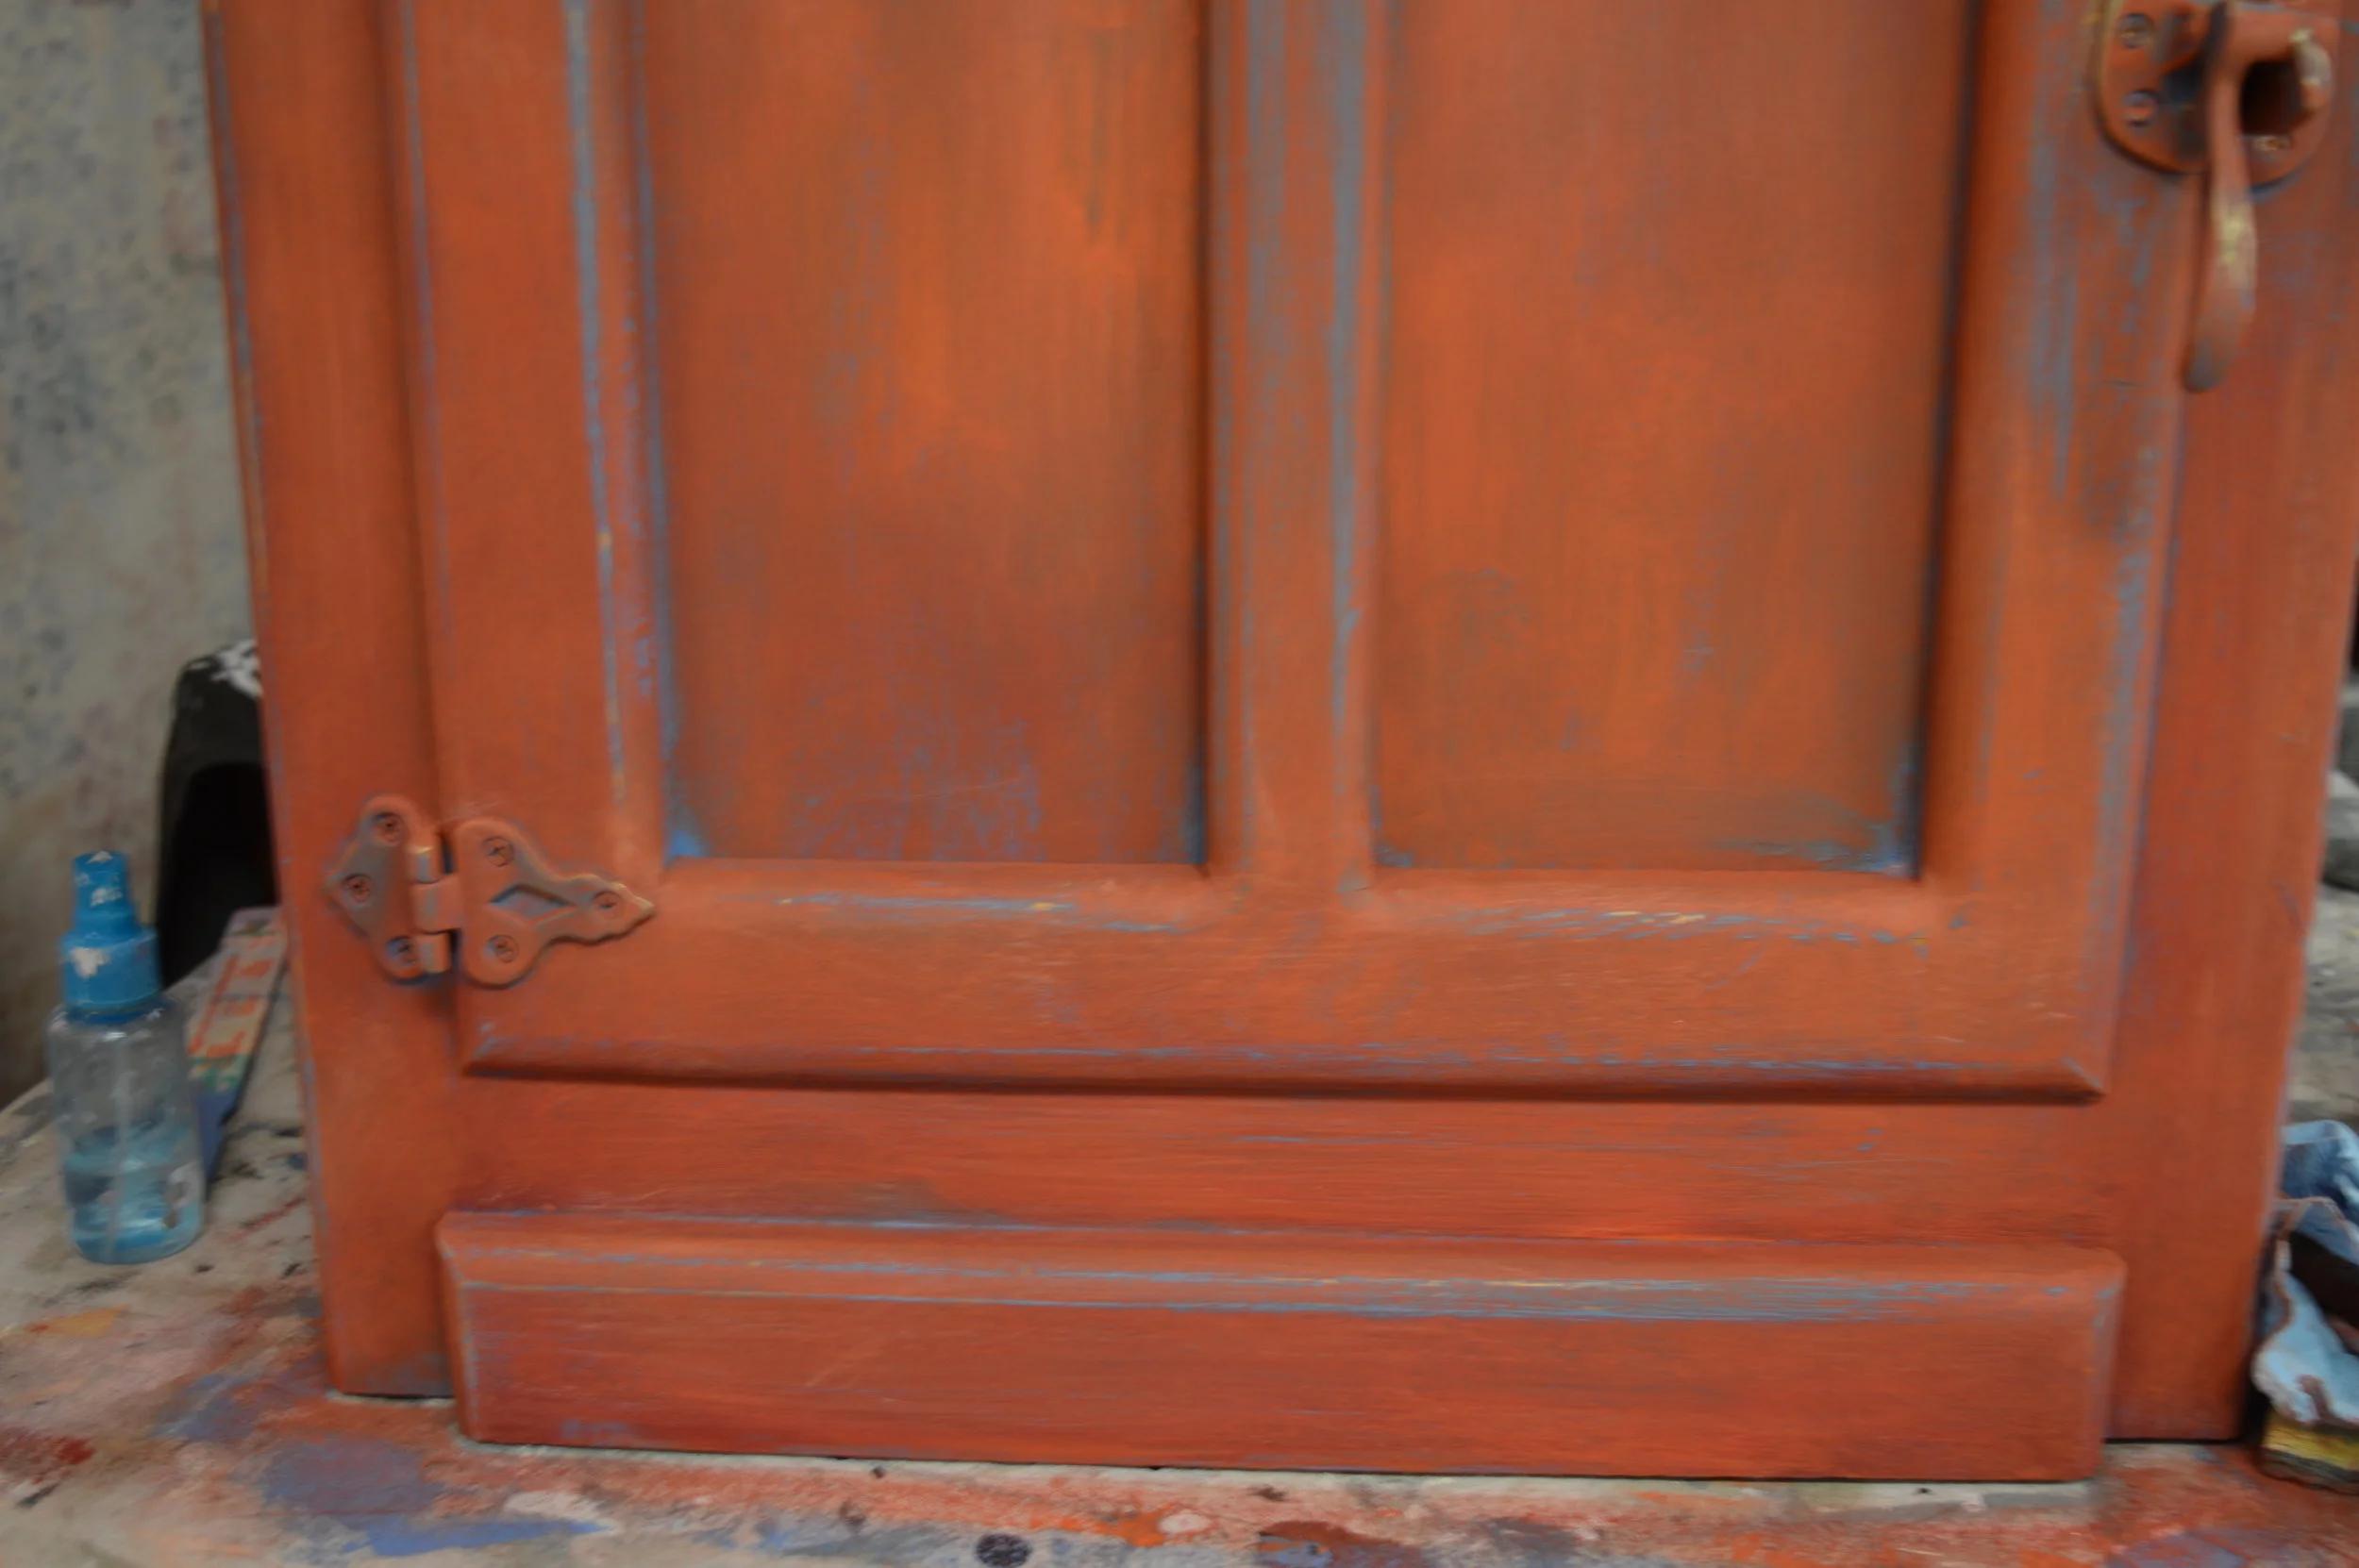
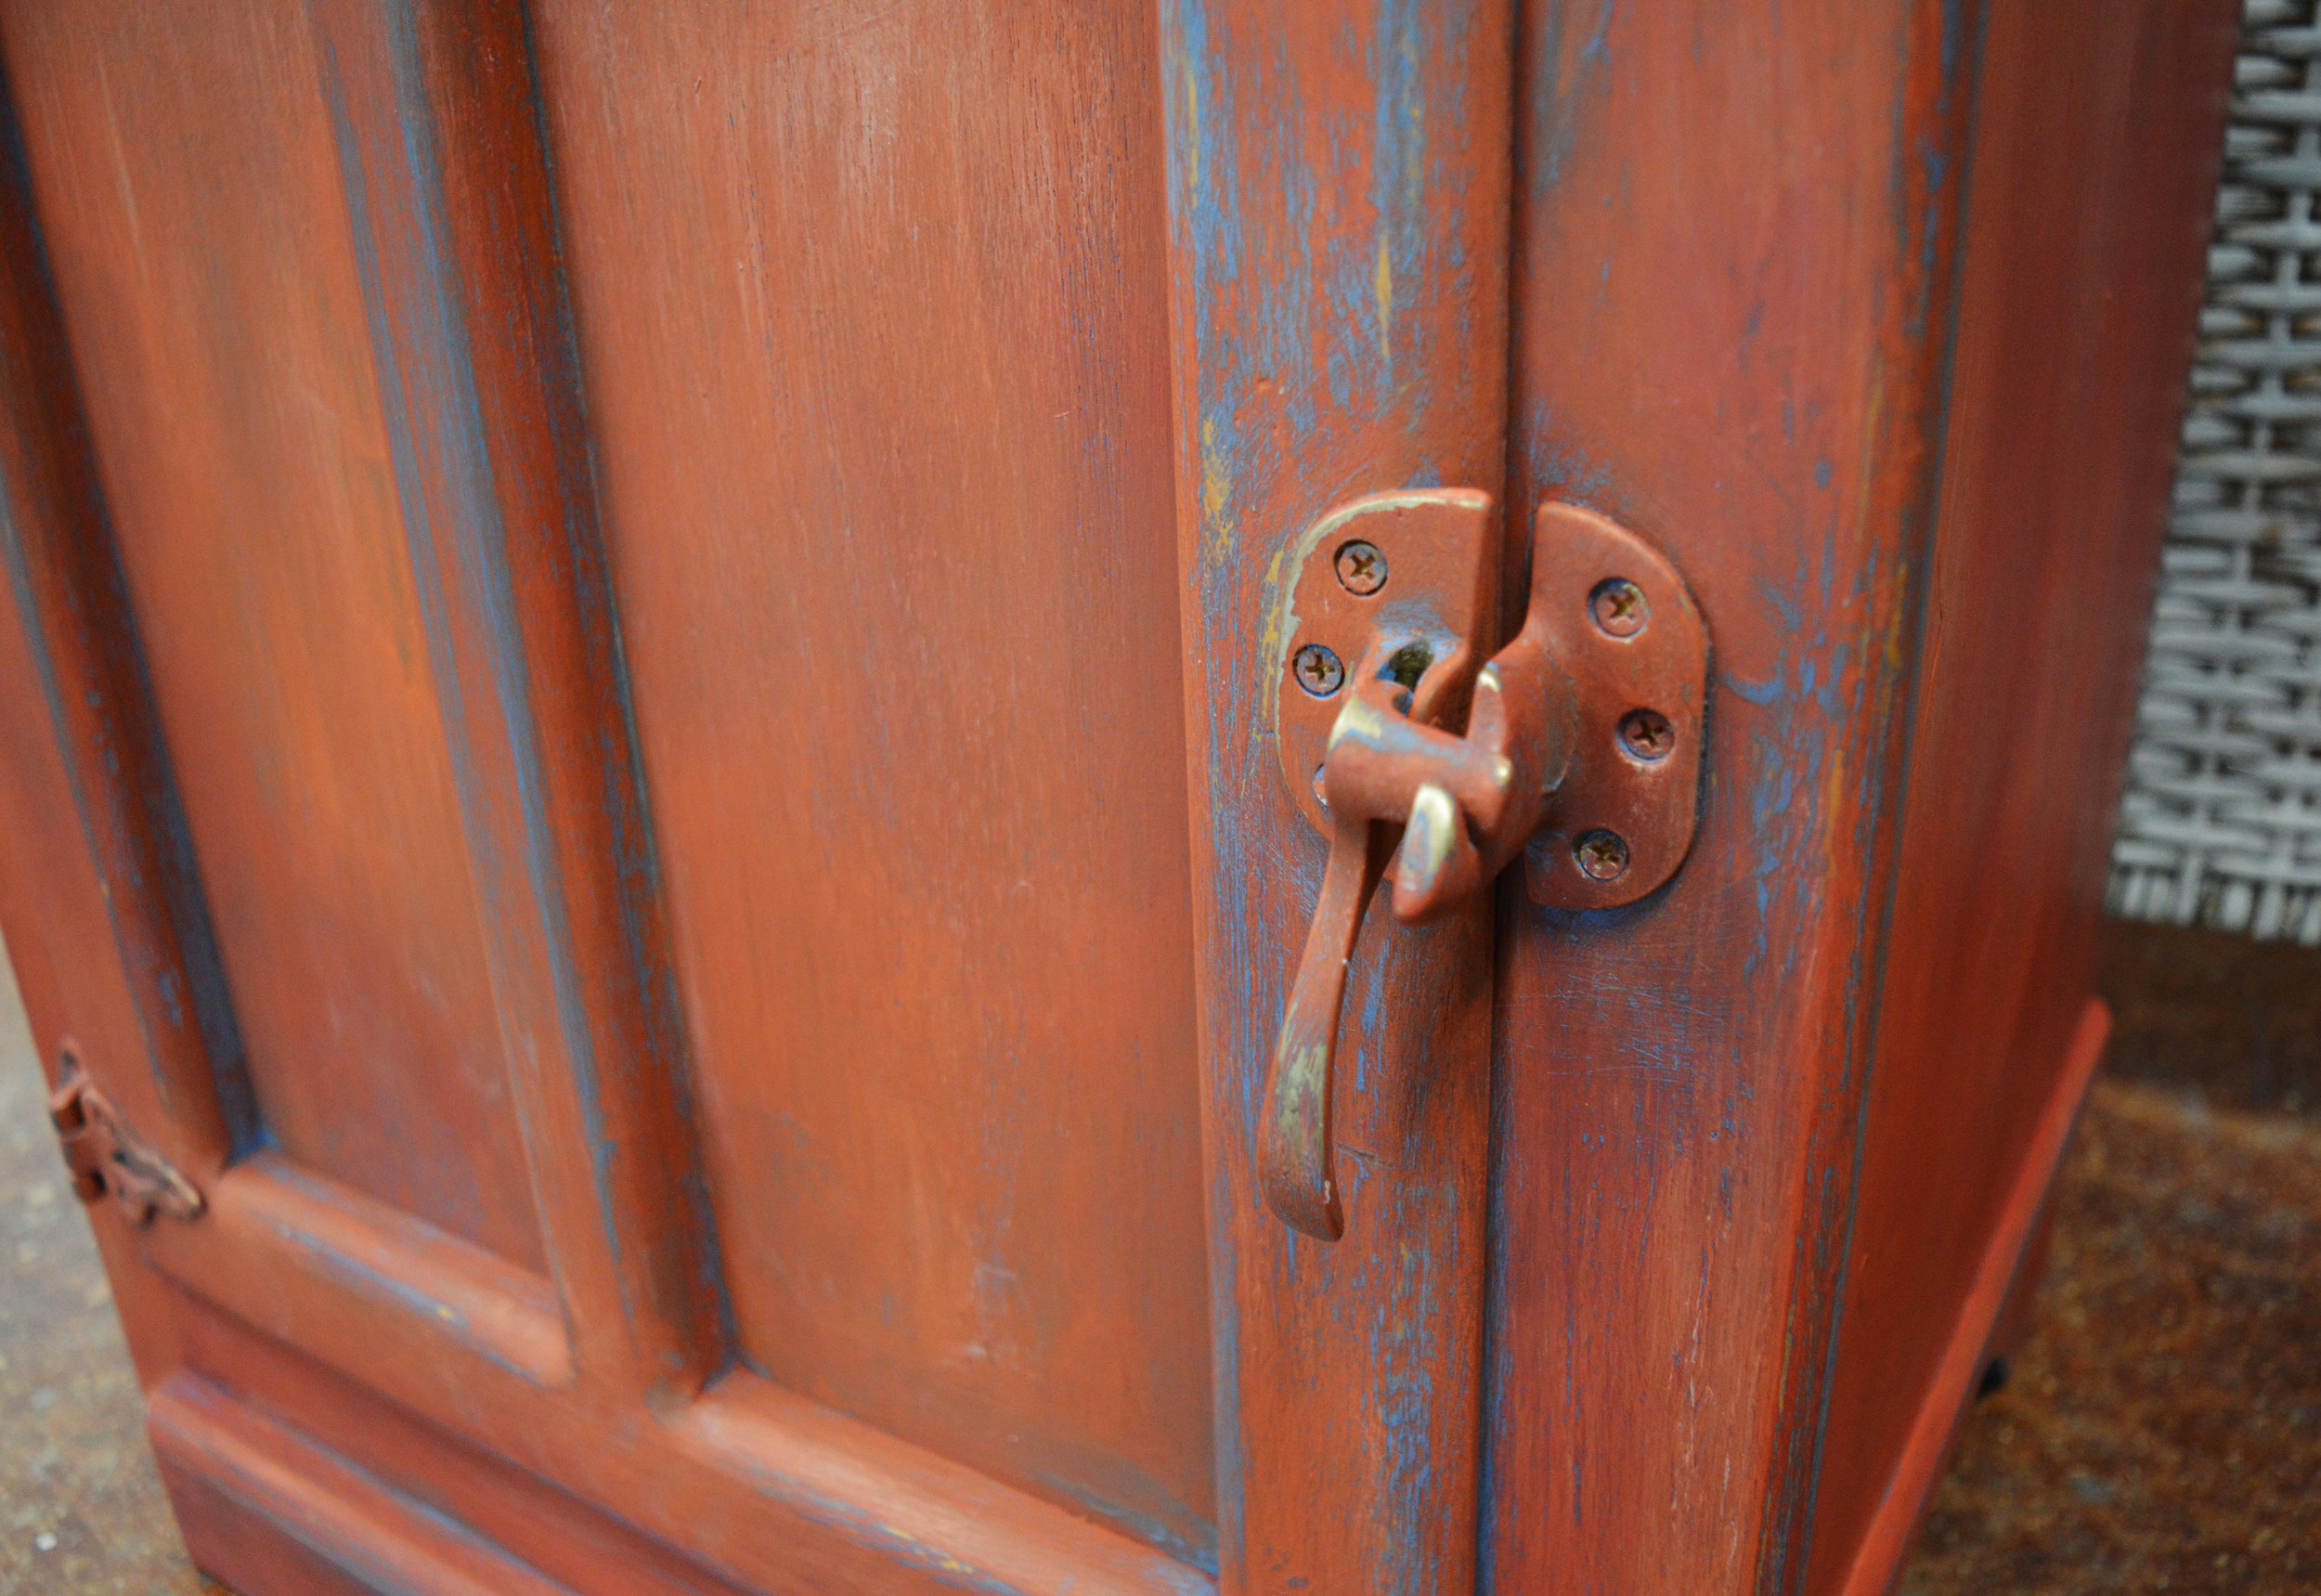
Barcelona Orange and Emperor's Silk were applied next simultaneously with two different brushes, blending together on the surface while wet. The more texture and visible layering, the better! We let some of the Greek Blue show through still in corners and strategic spots, and once the 'Persimmon' tone dried, some Old White was dry brushed over raised edges for accents. The goal was a look of an aged color patina. We even painted right over the hardware!


Then the distressing happened in a natural manner on edges and raised areas that might have aged with the piece if it was truly old (see our previous blog on tips for distressing). We went a bit heavier in areas right along the front and near the handle. Both 100-grit sandpaper and dampened edge of scrubbing sponge were used. And then we applied Chalk Paint® Clear Wax to finish.


We're delighted with the results and might replicate them in our own home! For now though this little piece packs a punch, and is at the shop waiting for its new home. Stop by to see it in person!


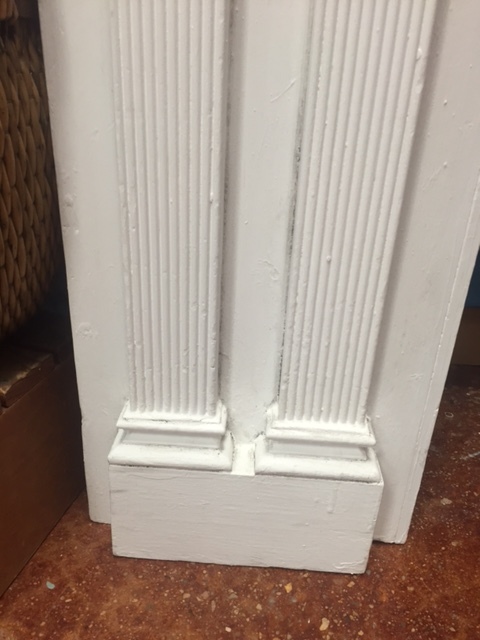
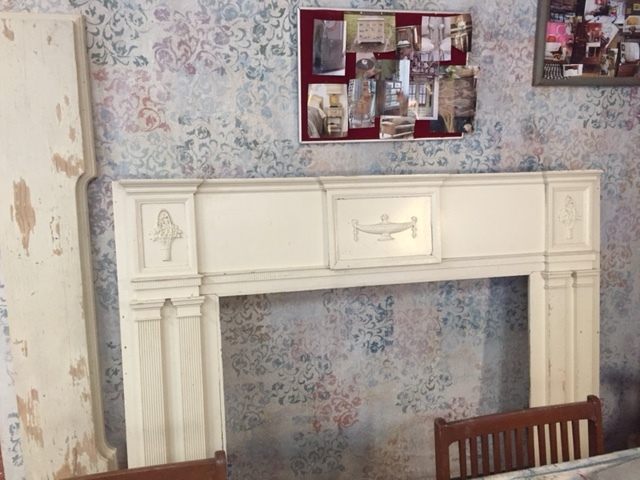
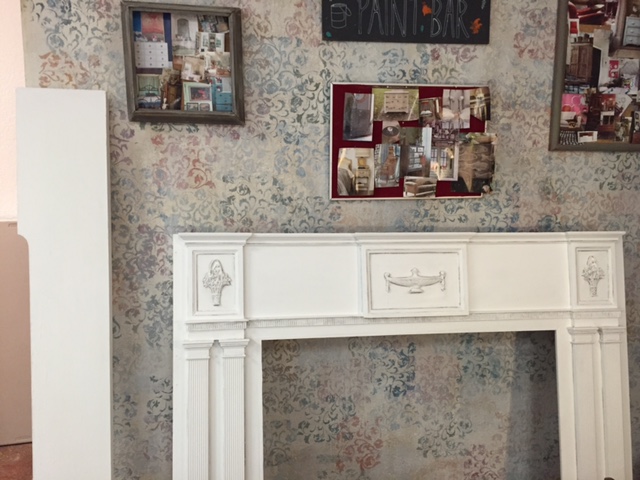
Before & After: Antique Mantle
We repainted and repaired an antique mantle, with Chalk Paint® Pure White plus waxes for a subtle yet fresh update!

When we were approached to rework this lovely antique mantle, we immediately said yes (for many reasons, mainly because we do this for a living duh!). This is something that we would only find in our vintage and antique-picking dreams we felt... and it needed some love and color updating for sure.
First we made sure to thoroughly clean it, plus sand and scrape away the peeling latex paint layers where applicable. Whenever working over a previously painted surface you must sand down chips and scrape away anything actively chipping, otherwise it can peel up your new paint layer. Next we assessed some cracking along seams of the 'shadow box' details:


This is not an uncommon encounter when working on old wooden pieces. Seams can split, and one common place to notice this is on everyday surfaces like doors, cabinetry, and window frames. We caulked these with 'painters caulk,' Big Stretch specifically. It's geared toward high flux of seams especially when painted over (make sure to check cure times and time between caulk and paint when using on your own). We trust this option too because once cured, Chalk Paint® decorative paint would adhere well.
Next we primed with our water-based, white-tinted Smart Prime because some old stains were evident to be popping through the Pure White. We think these may have been from old smoke that absorbed into the wood from long ago use. No matter how much you clean, sometimes a chemical or other substance might just need to be covered up durably! We learn to be flexible with these things...
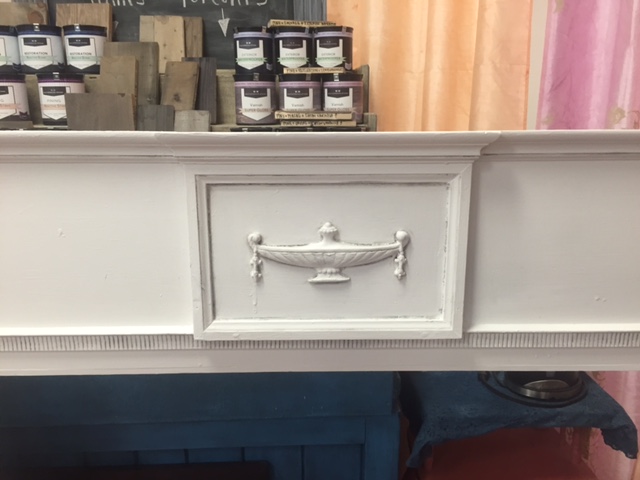
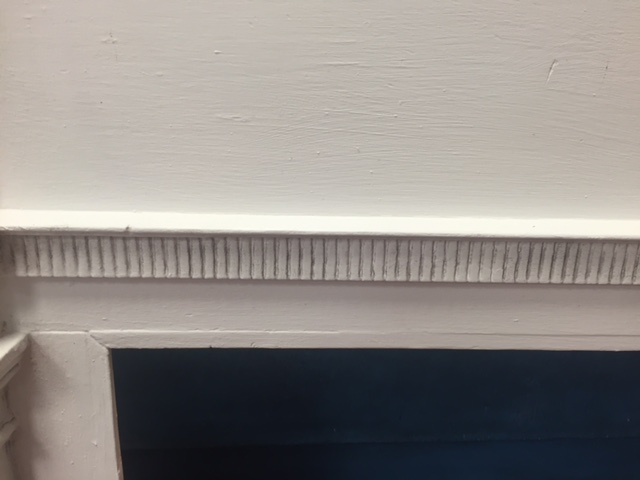
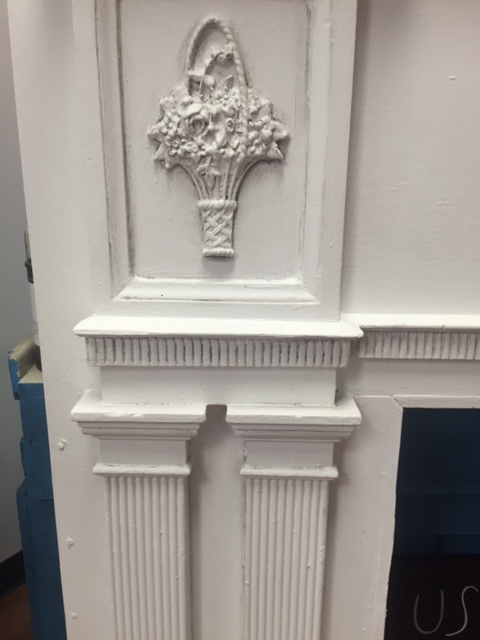
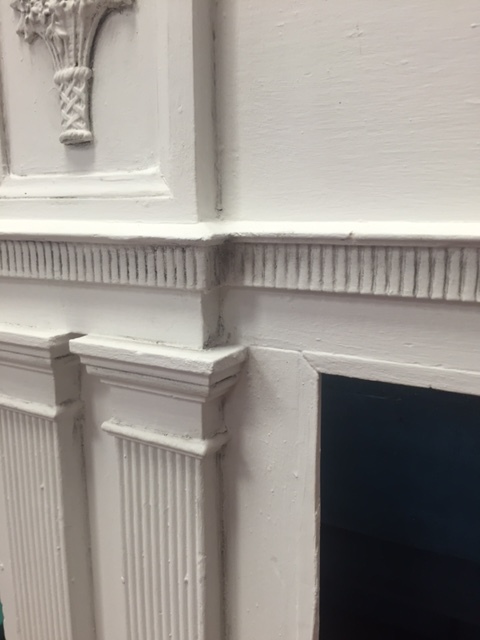

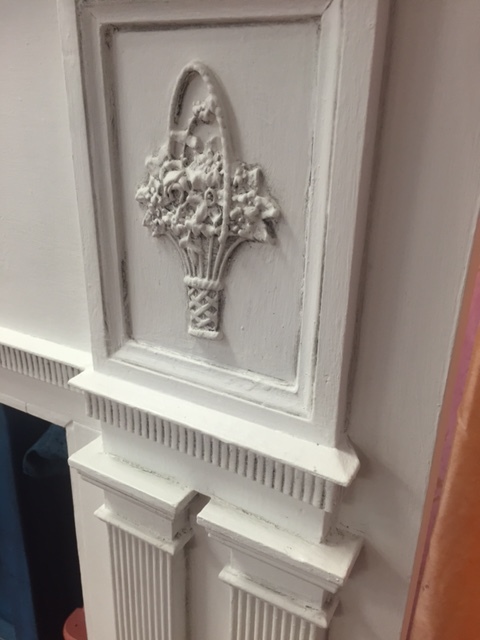
And then two coats Pure White Chalk Paint® decorative paint, plus clear wax all over, and black wax in the details with a light hand. Voila! It's not a super drastic change, however it breathed new life into this piece by freshening it up and helped the uniquely carved details stand out better. Have you painted a mantle before? How did it turn out? Feel free to share! Happy Painting xoxo

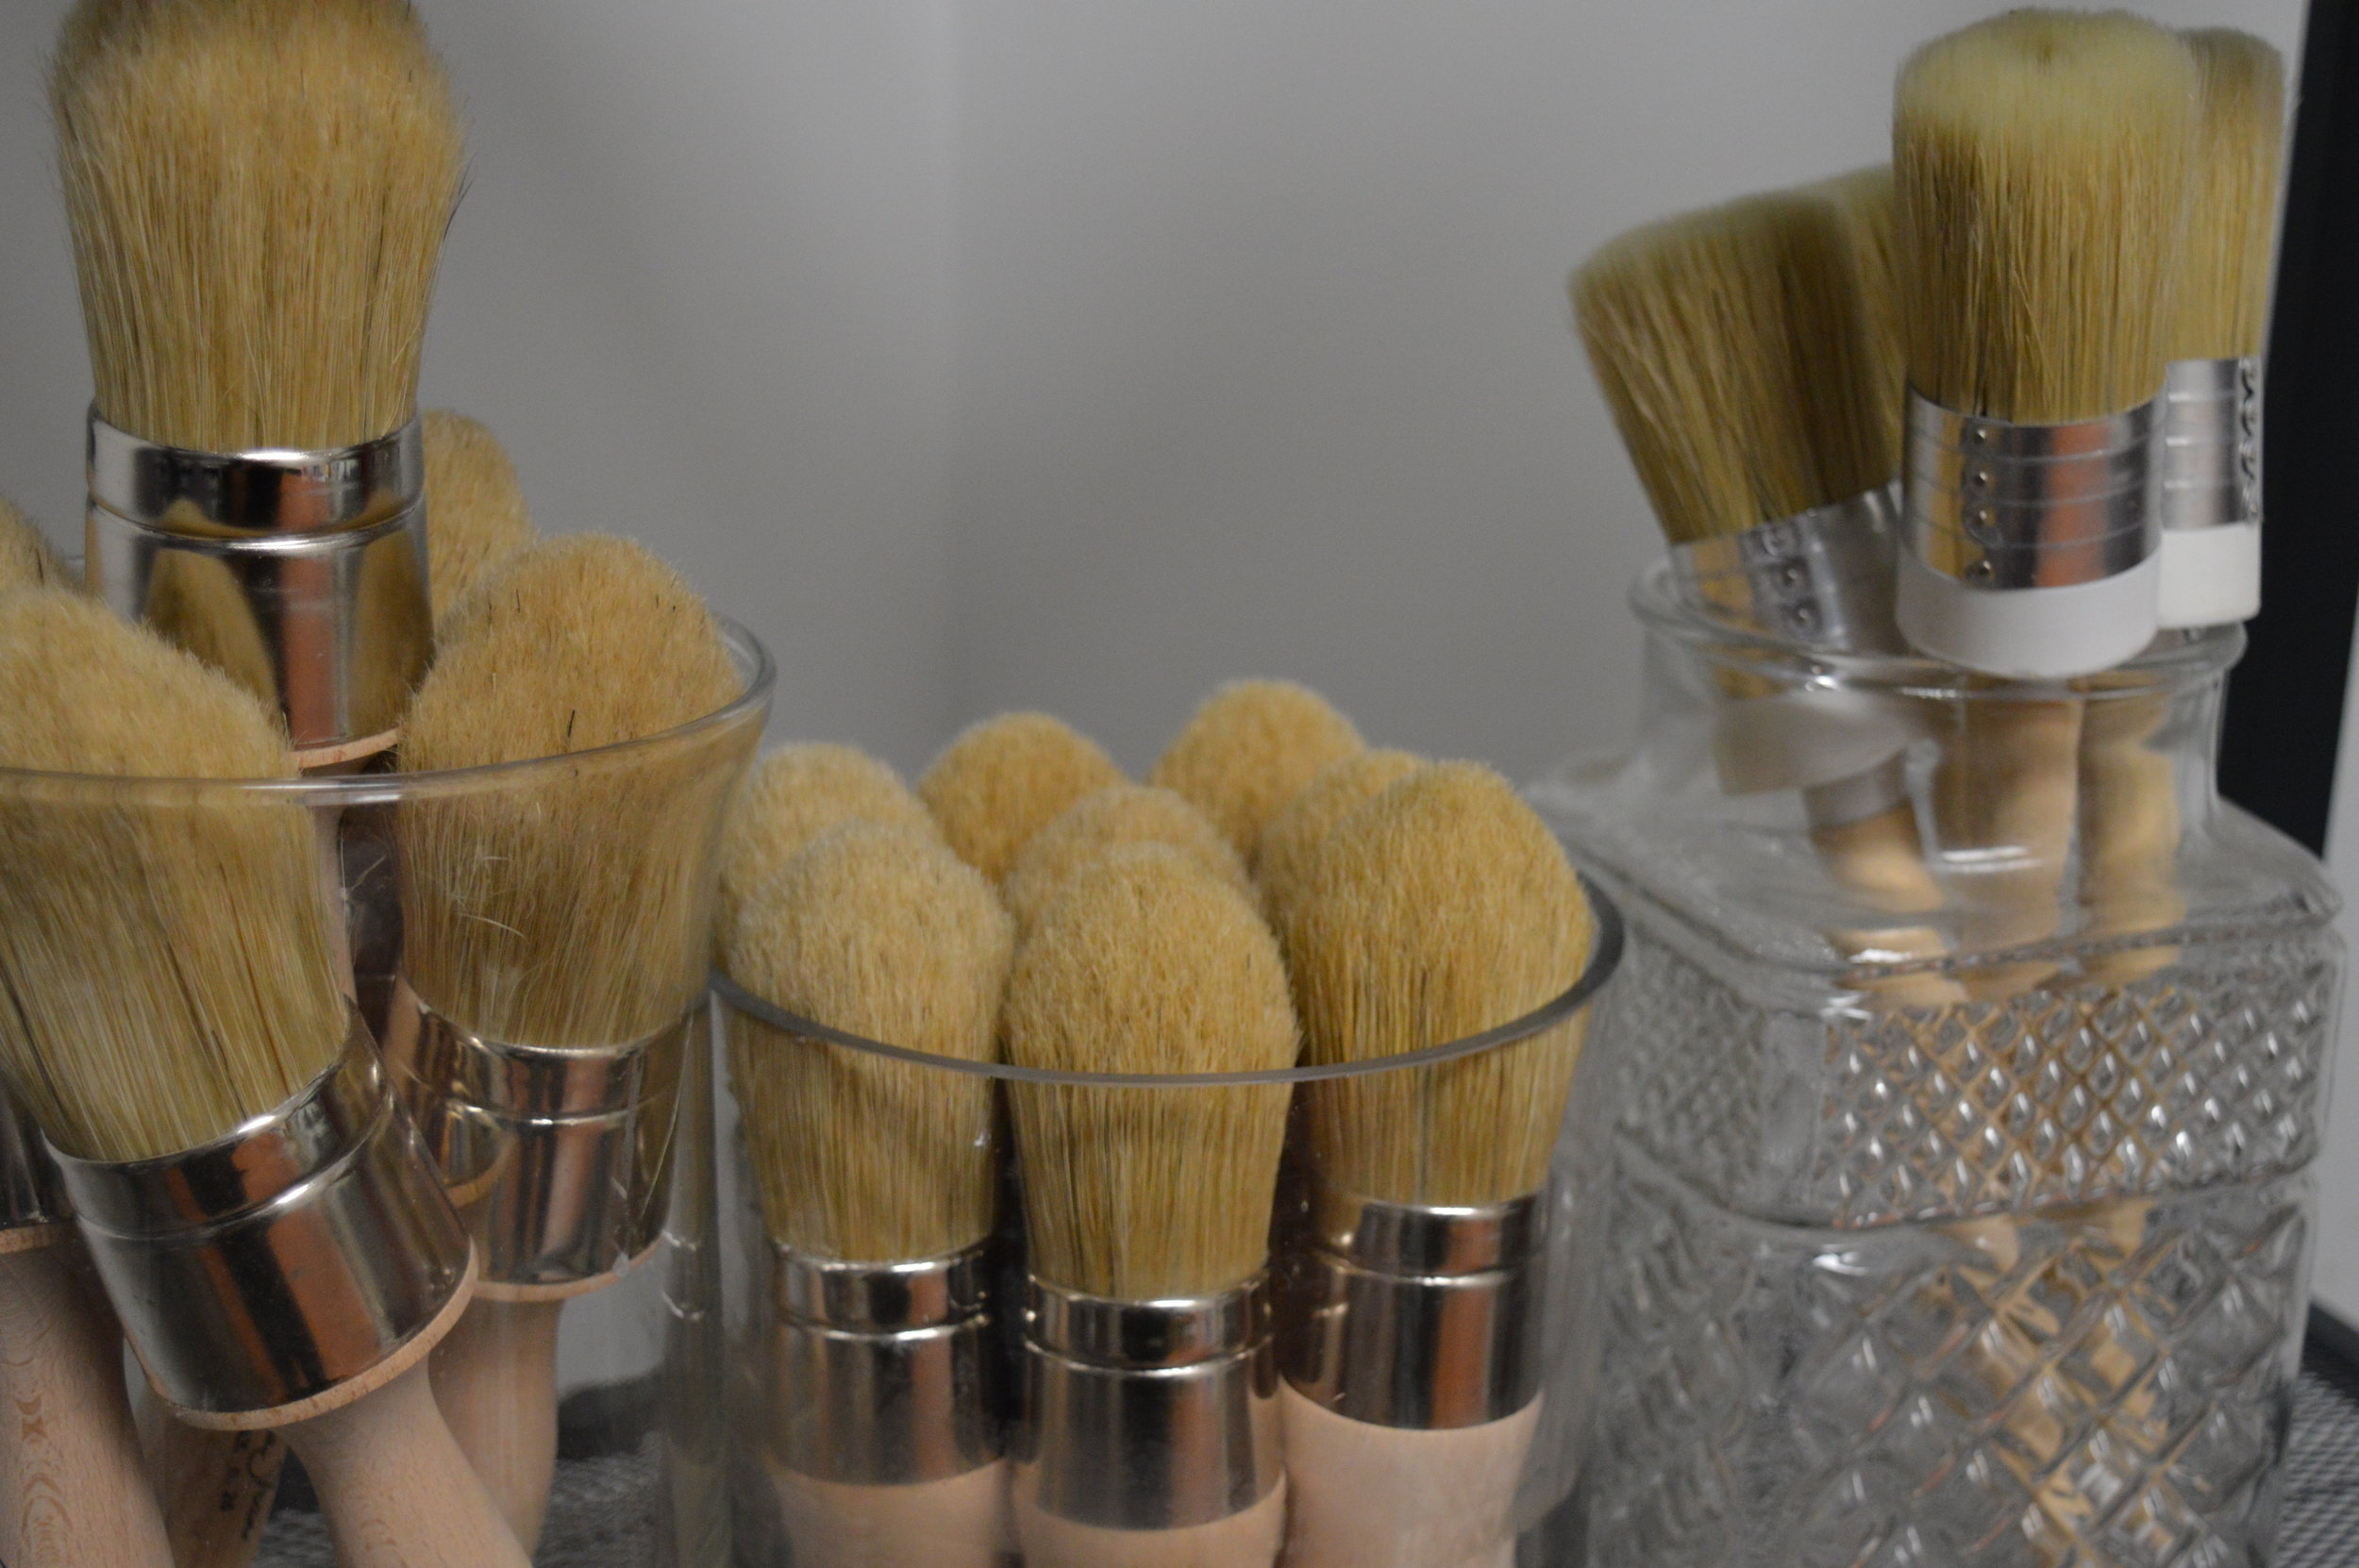
Inside the Toolbox: Using Annie Sloan's Flat Brushes for Smooth Finishes
Why we love using Annie Sloan's Flat Brushes for smooth painted finishes.
Hello in the new year! For our first blog post of 2017, we wanted to jump right in and talk about smooth, sleek painted finishes. These are the quintessential contemporary, modern, and even Mid-century Modern finishes that are not only popular at the moment but timeless. As you know, Chalk Paint® by Annie Sloan is versatile for both smooth and rustic techniques. How do we achieve such looks though?
Since Chalk Paint® decorative paint is a bit thicker than other types of paint, achieving specific finishes can come down to the type of brush. Chalk Paint® is already relatively self-leveling (especially once a layer of Soft Wax is applied), so it's not difficult to use your brush for smooth finishes. To minimize the look of brush strokes, use Annie Sloan's Flat Brushes. As high-quality synthetic brushes, they've been made to specifically work well with her paint line. When painting, work the brush from one side to the next of each section of your piece, working 'with the grain.' Each layer of paint should be thin and allowed to dry thoroughly before the next. Adding a tiny bit of water in with your paint can also help spread each stroke nicely, with minimized appearance. Anytime you feel the need to slightly sand, don't hesitate! See our video below:
The Flat brushes come in two sizes, giving greater accessibility for different sized surfaces. The small size is thin and narrow, and perfect for trim and other small spaces. They're easy to clean with soap and water. We always stock both sizes in our brick & mortar shop and online.
*You may have also seen painting techniques where brushstrokes are painted haphazardly, in an almost cross-hatched effect. This is a technique that Annie Sloan displays well, which fools the eye into thinking the surface looks flat and even due to optical confusion. Try your hand with that using the Flat Brushes if you'd like as well!
Happy Painting xo.